I don’t recommend using DigitalOcean App Platform for hosting WordPress or other PHP apps due to its serious performance issues. Please see this more recent blog post for more details.
When DigitalOcean came out with its managed App Platform, I got interested if I can run WordPress on it. It took me one afternoon to get WordPress up and running, here’s how you can do it.
Create a WordPress site
Default WordPress installation is not very well suited for running in a “serverless” environment since it uses wp-config.php instead of environment variables for configuration. So in the example, we are using Roots Bedrock which is a normal WordPress installation but modified for more modern configuration (Composer, environment variables, webroot in a subfolder, etc.)
You can download the latest Bedrock version on GitHub releases. I want to use Nginx instead of the default Apache server because it scales better so I need to create a nginx.conf file in the root of the repo with the following content:
index index.php index.html;

location / {
    try_files $uri $uri/ /index.php?$args;
}
Create a Managed Database
To store our data, we’re using a DigitalOcean Managed Database. Add a new database in the DO admin panel and select MySQL as the database engine.
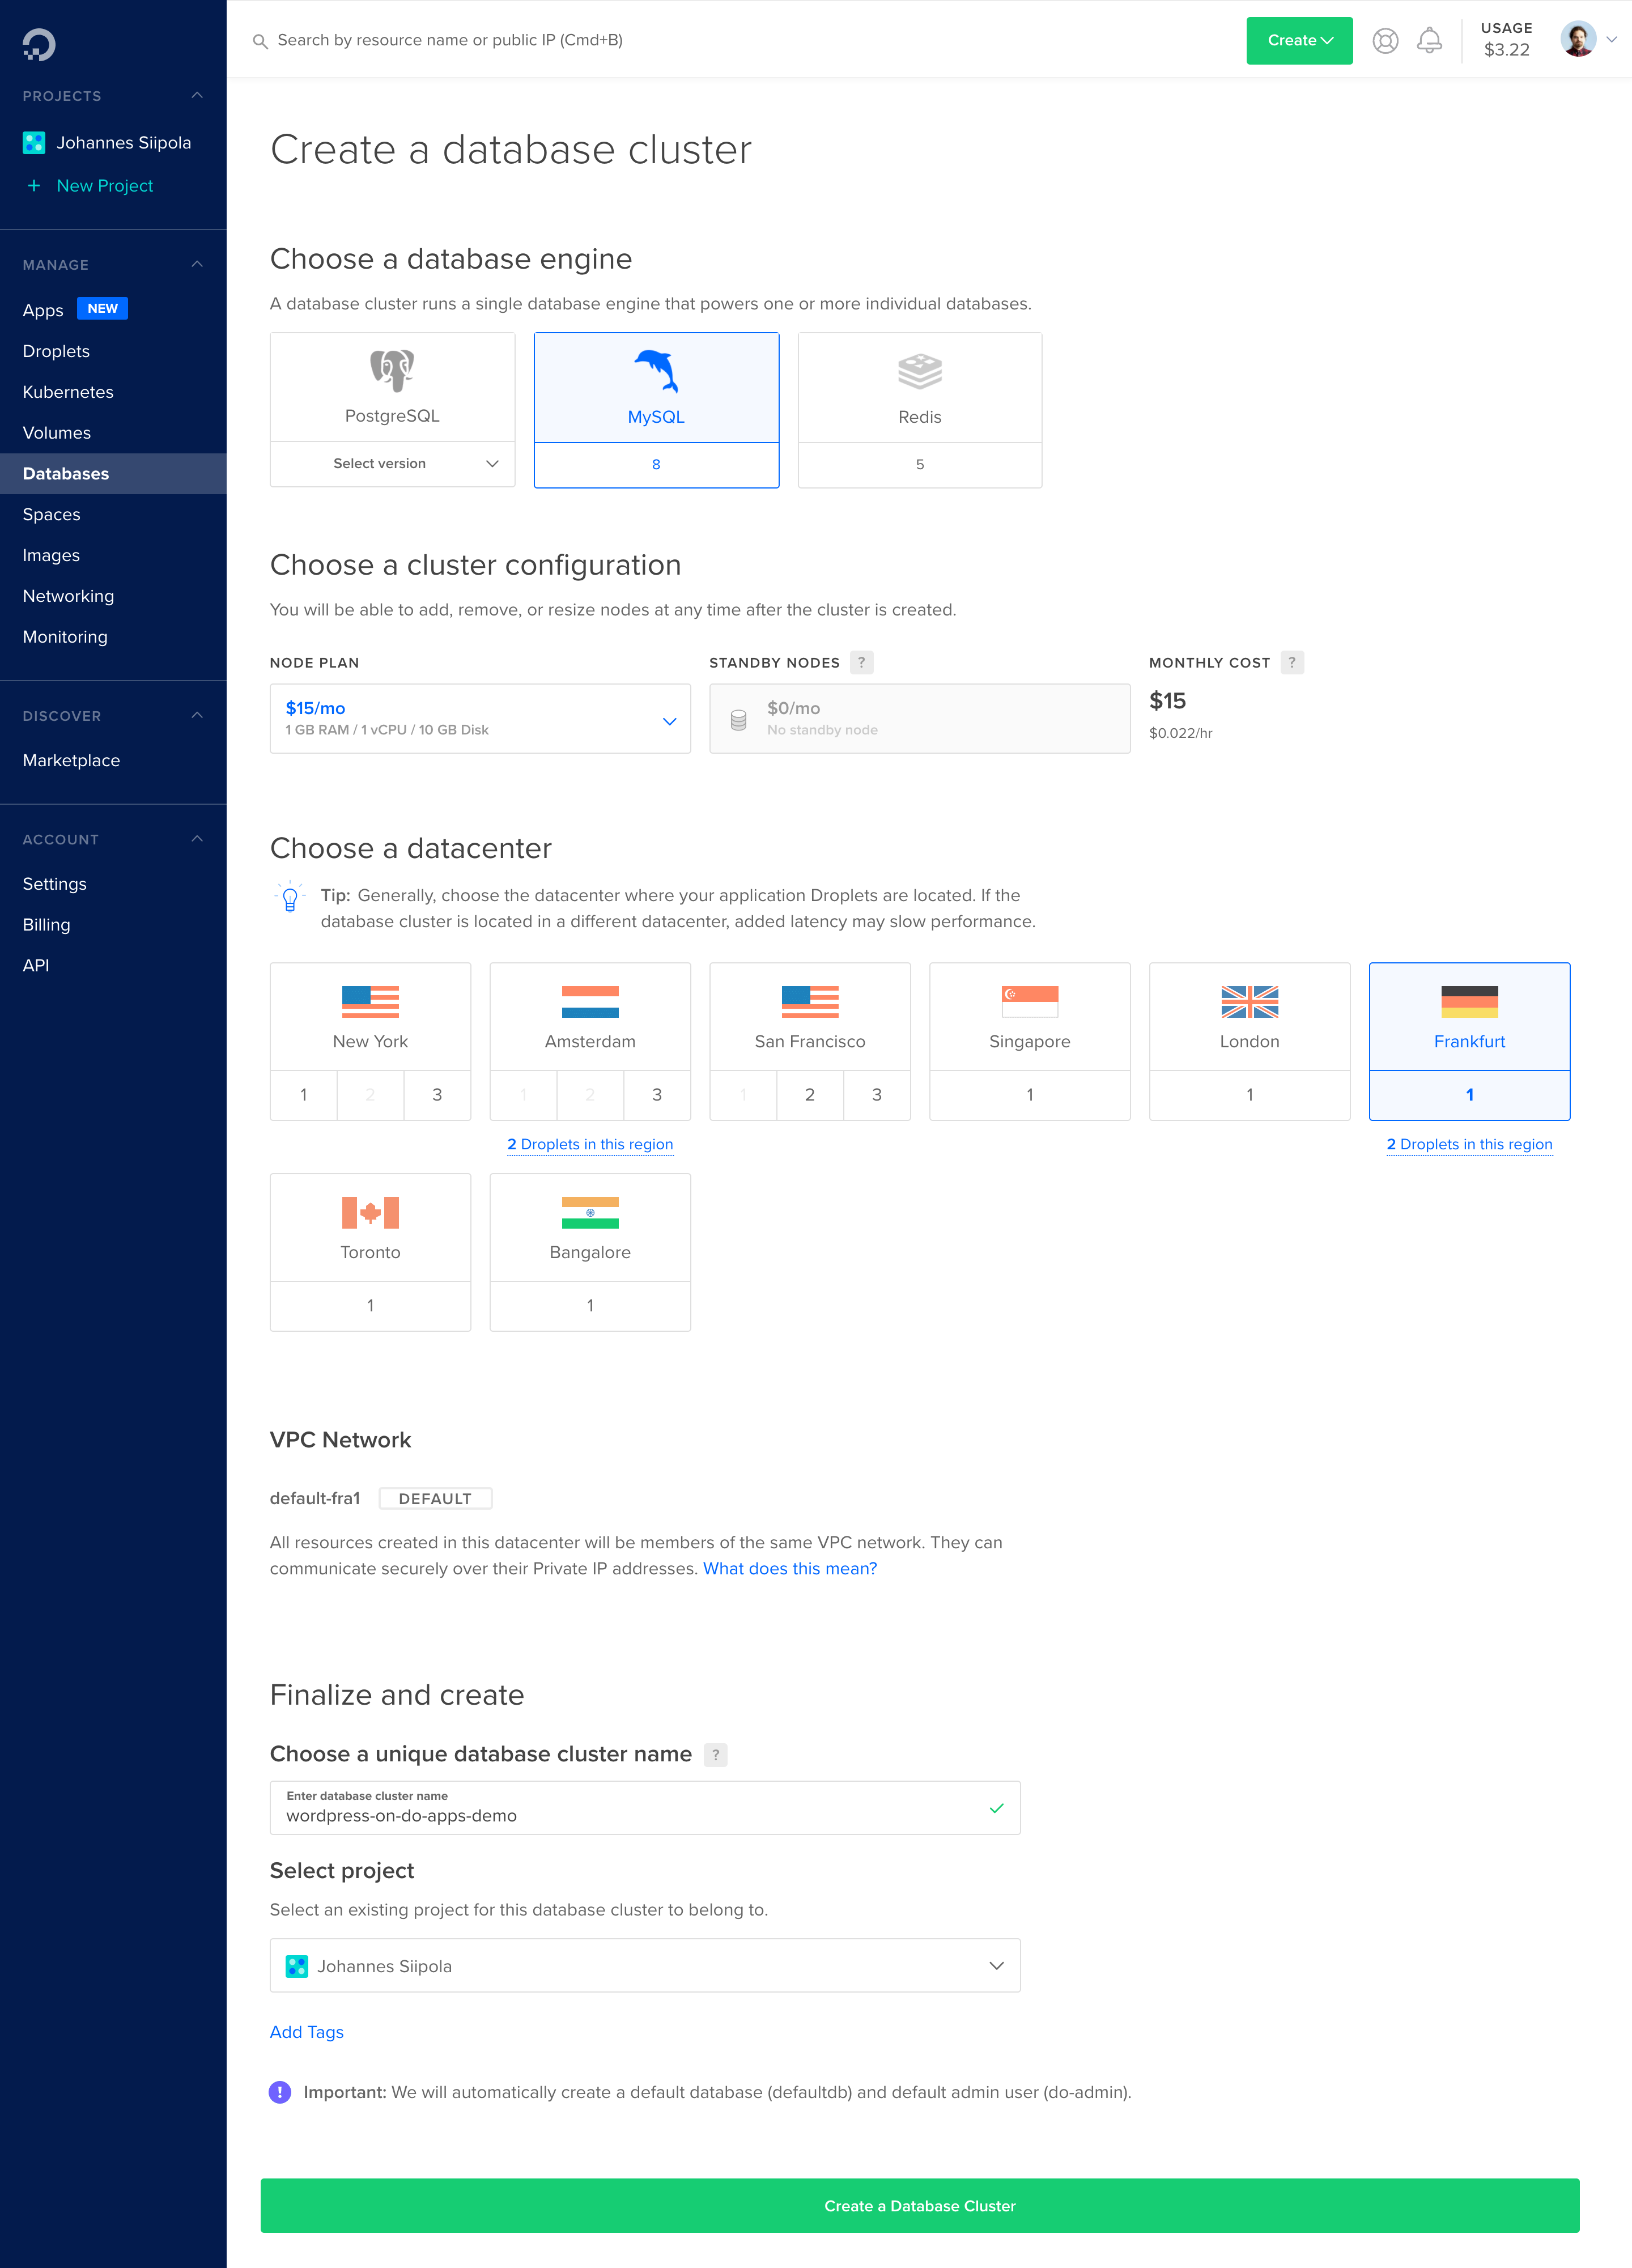
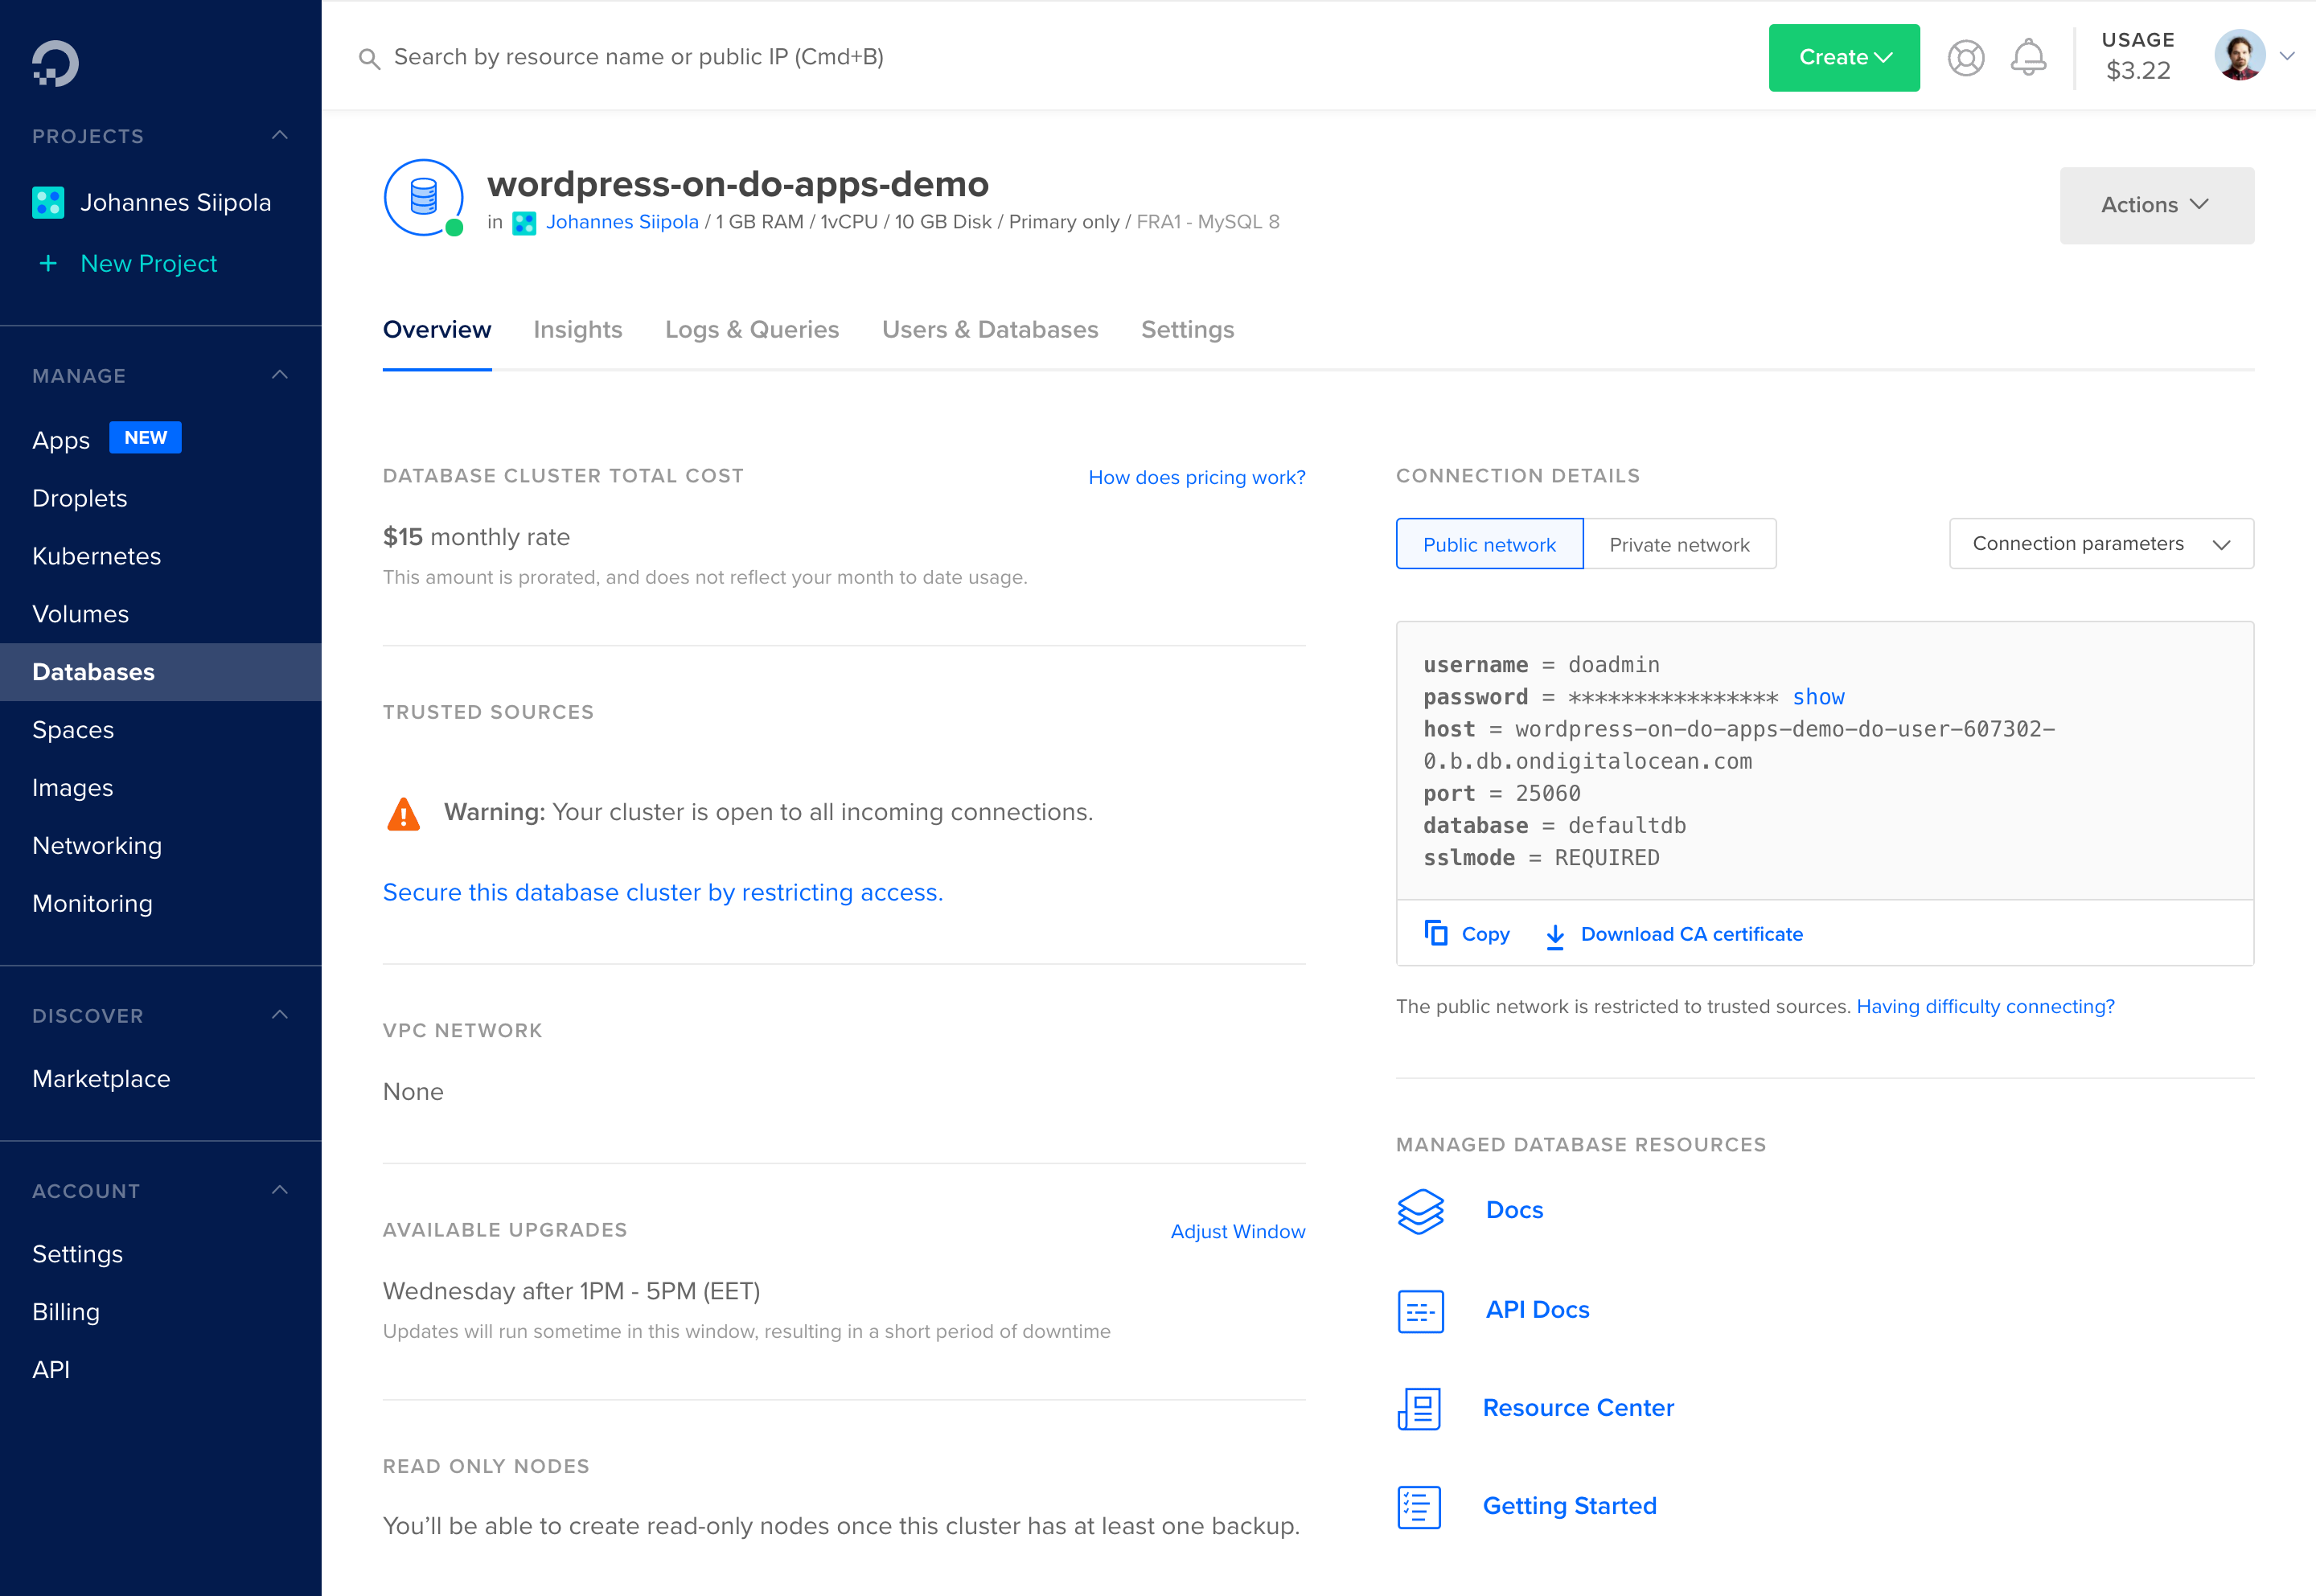
Grab a cup of coffee, it’ll take some time before the database is provisioned. After it’s done you should be able to see the database details.
Create an App
After we have created the database, we can create a new app. Navigate to the Apps tab in the DO admin panel and create a new app.
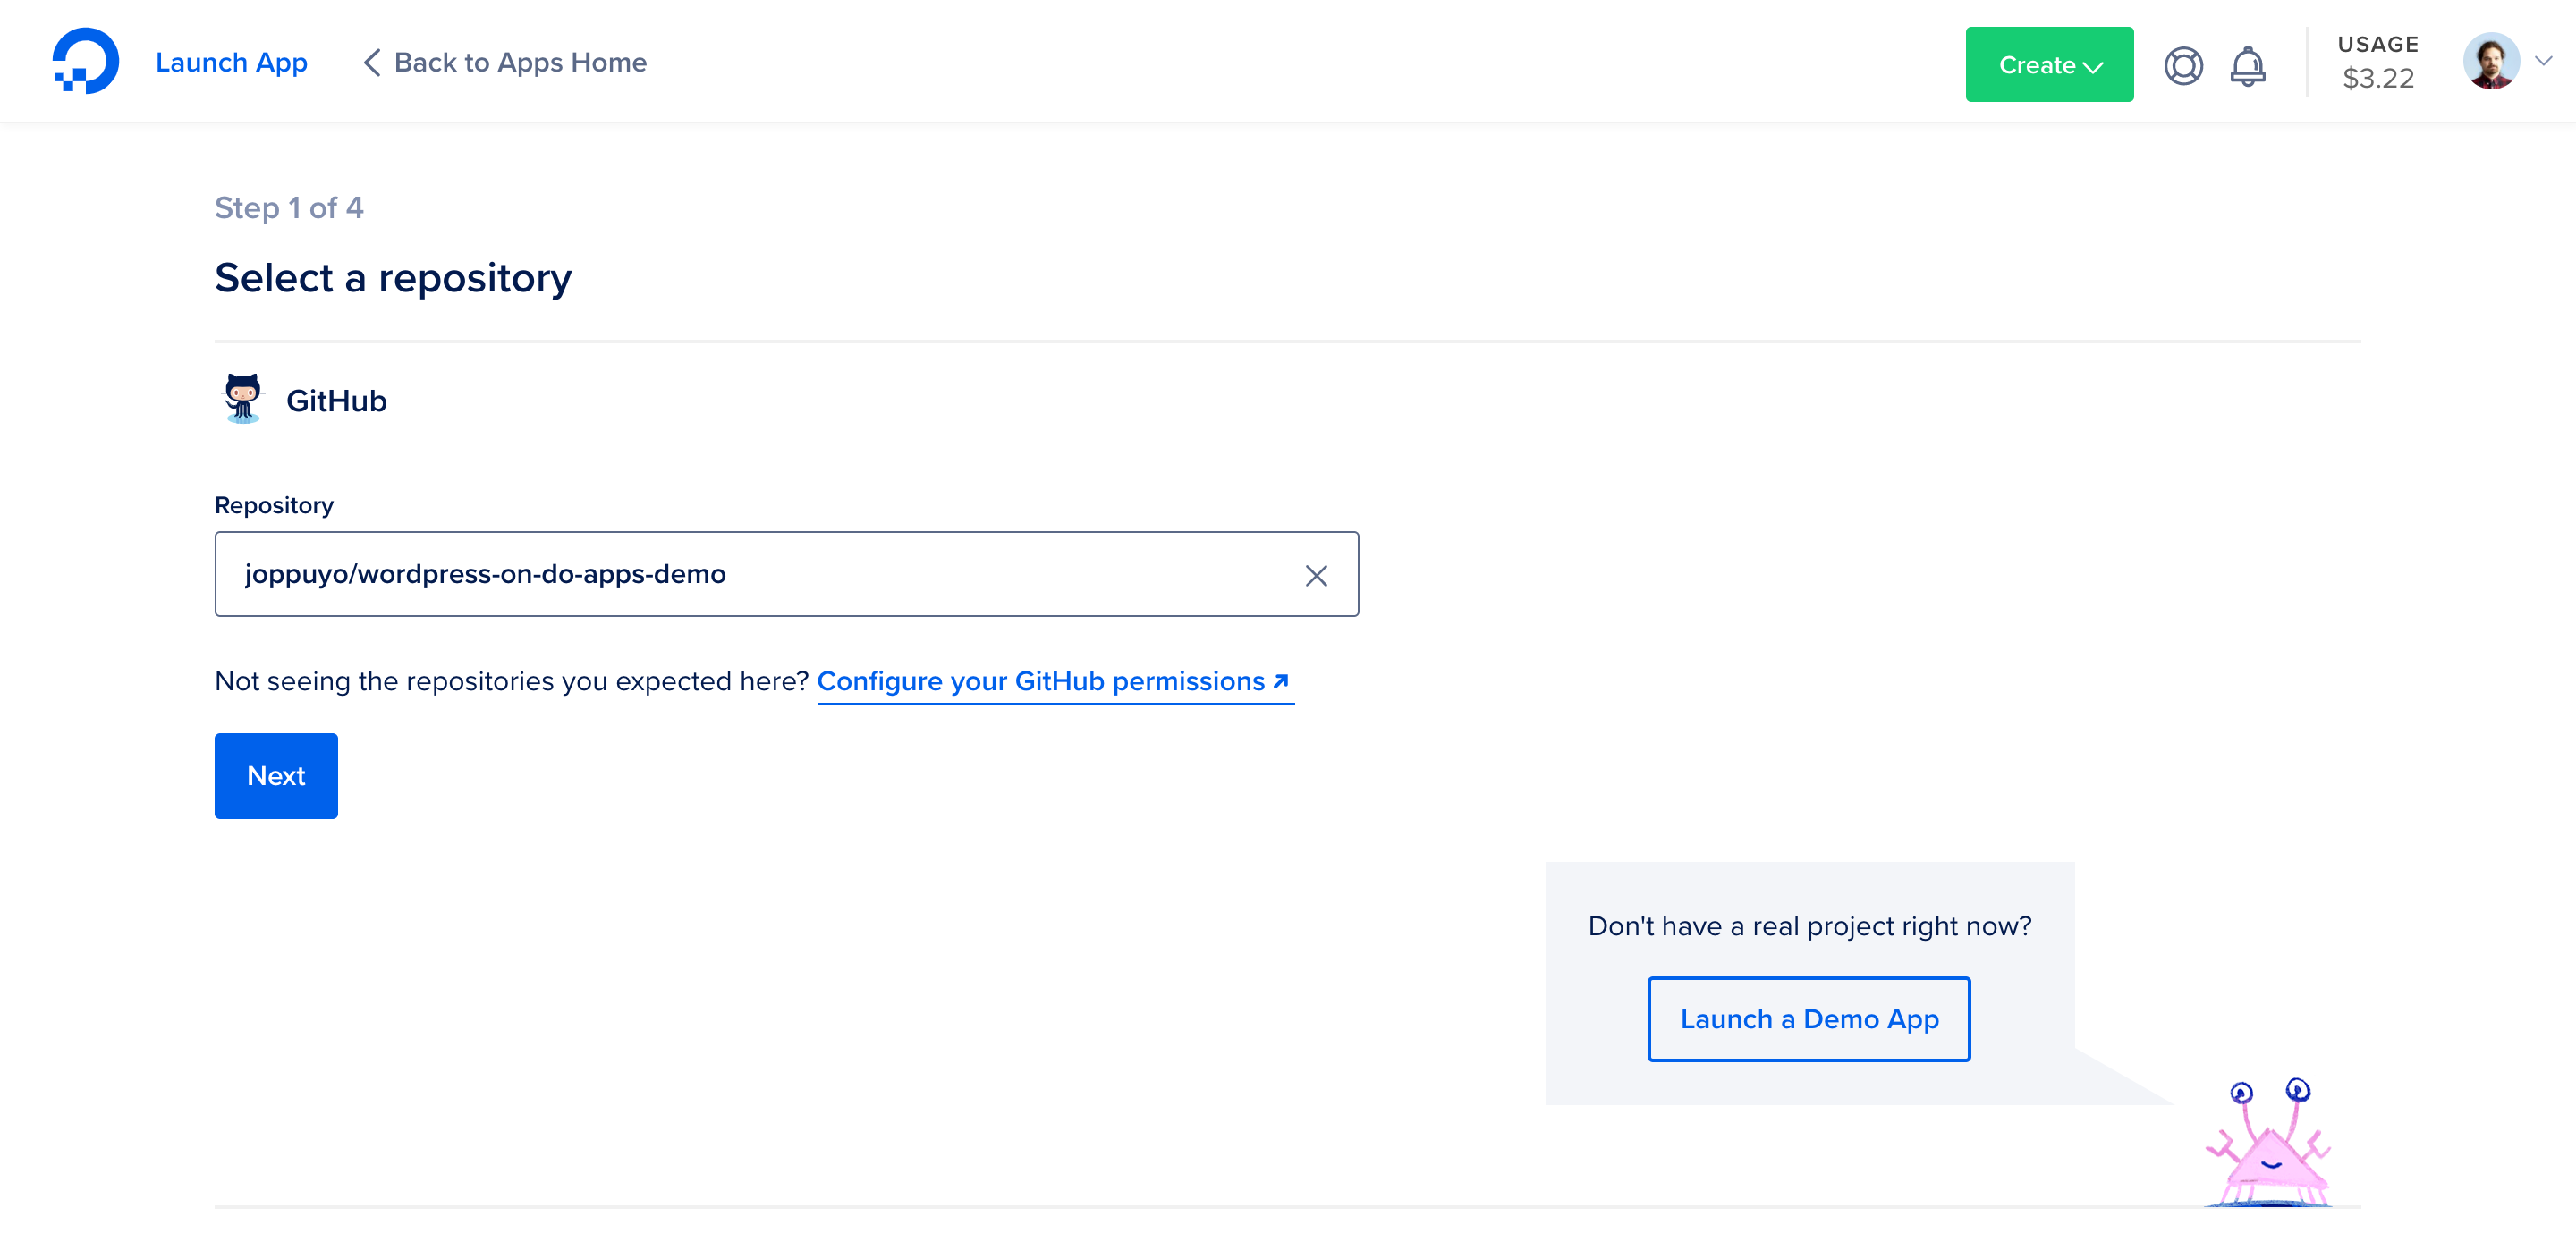
Select the Git repository where you have the Bedrock WordPress installation.
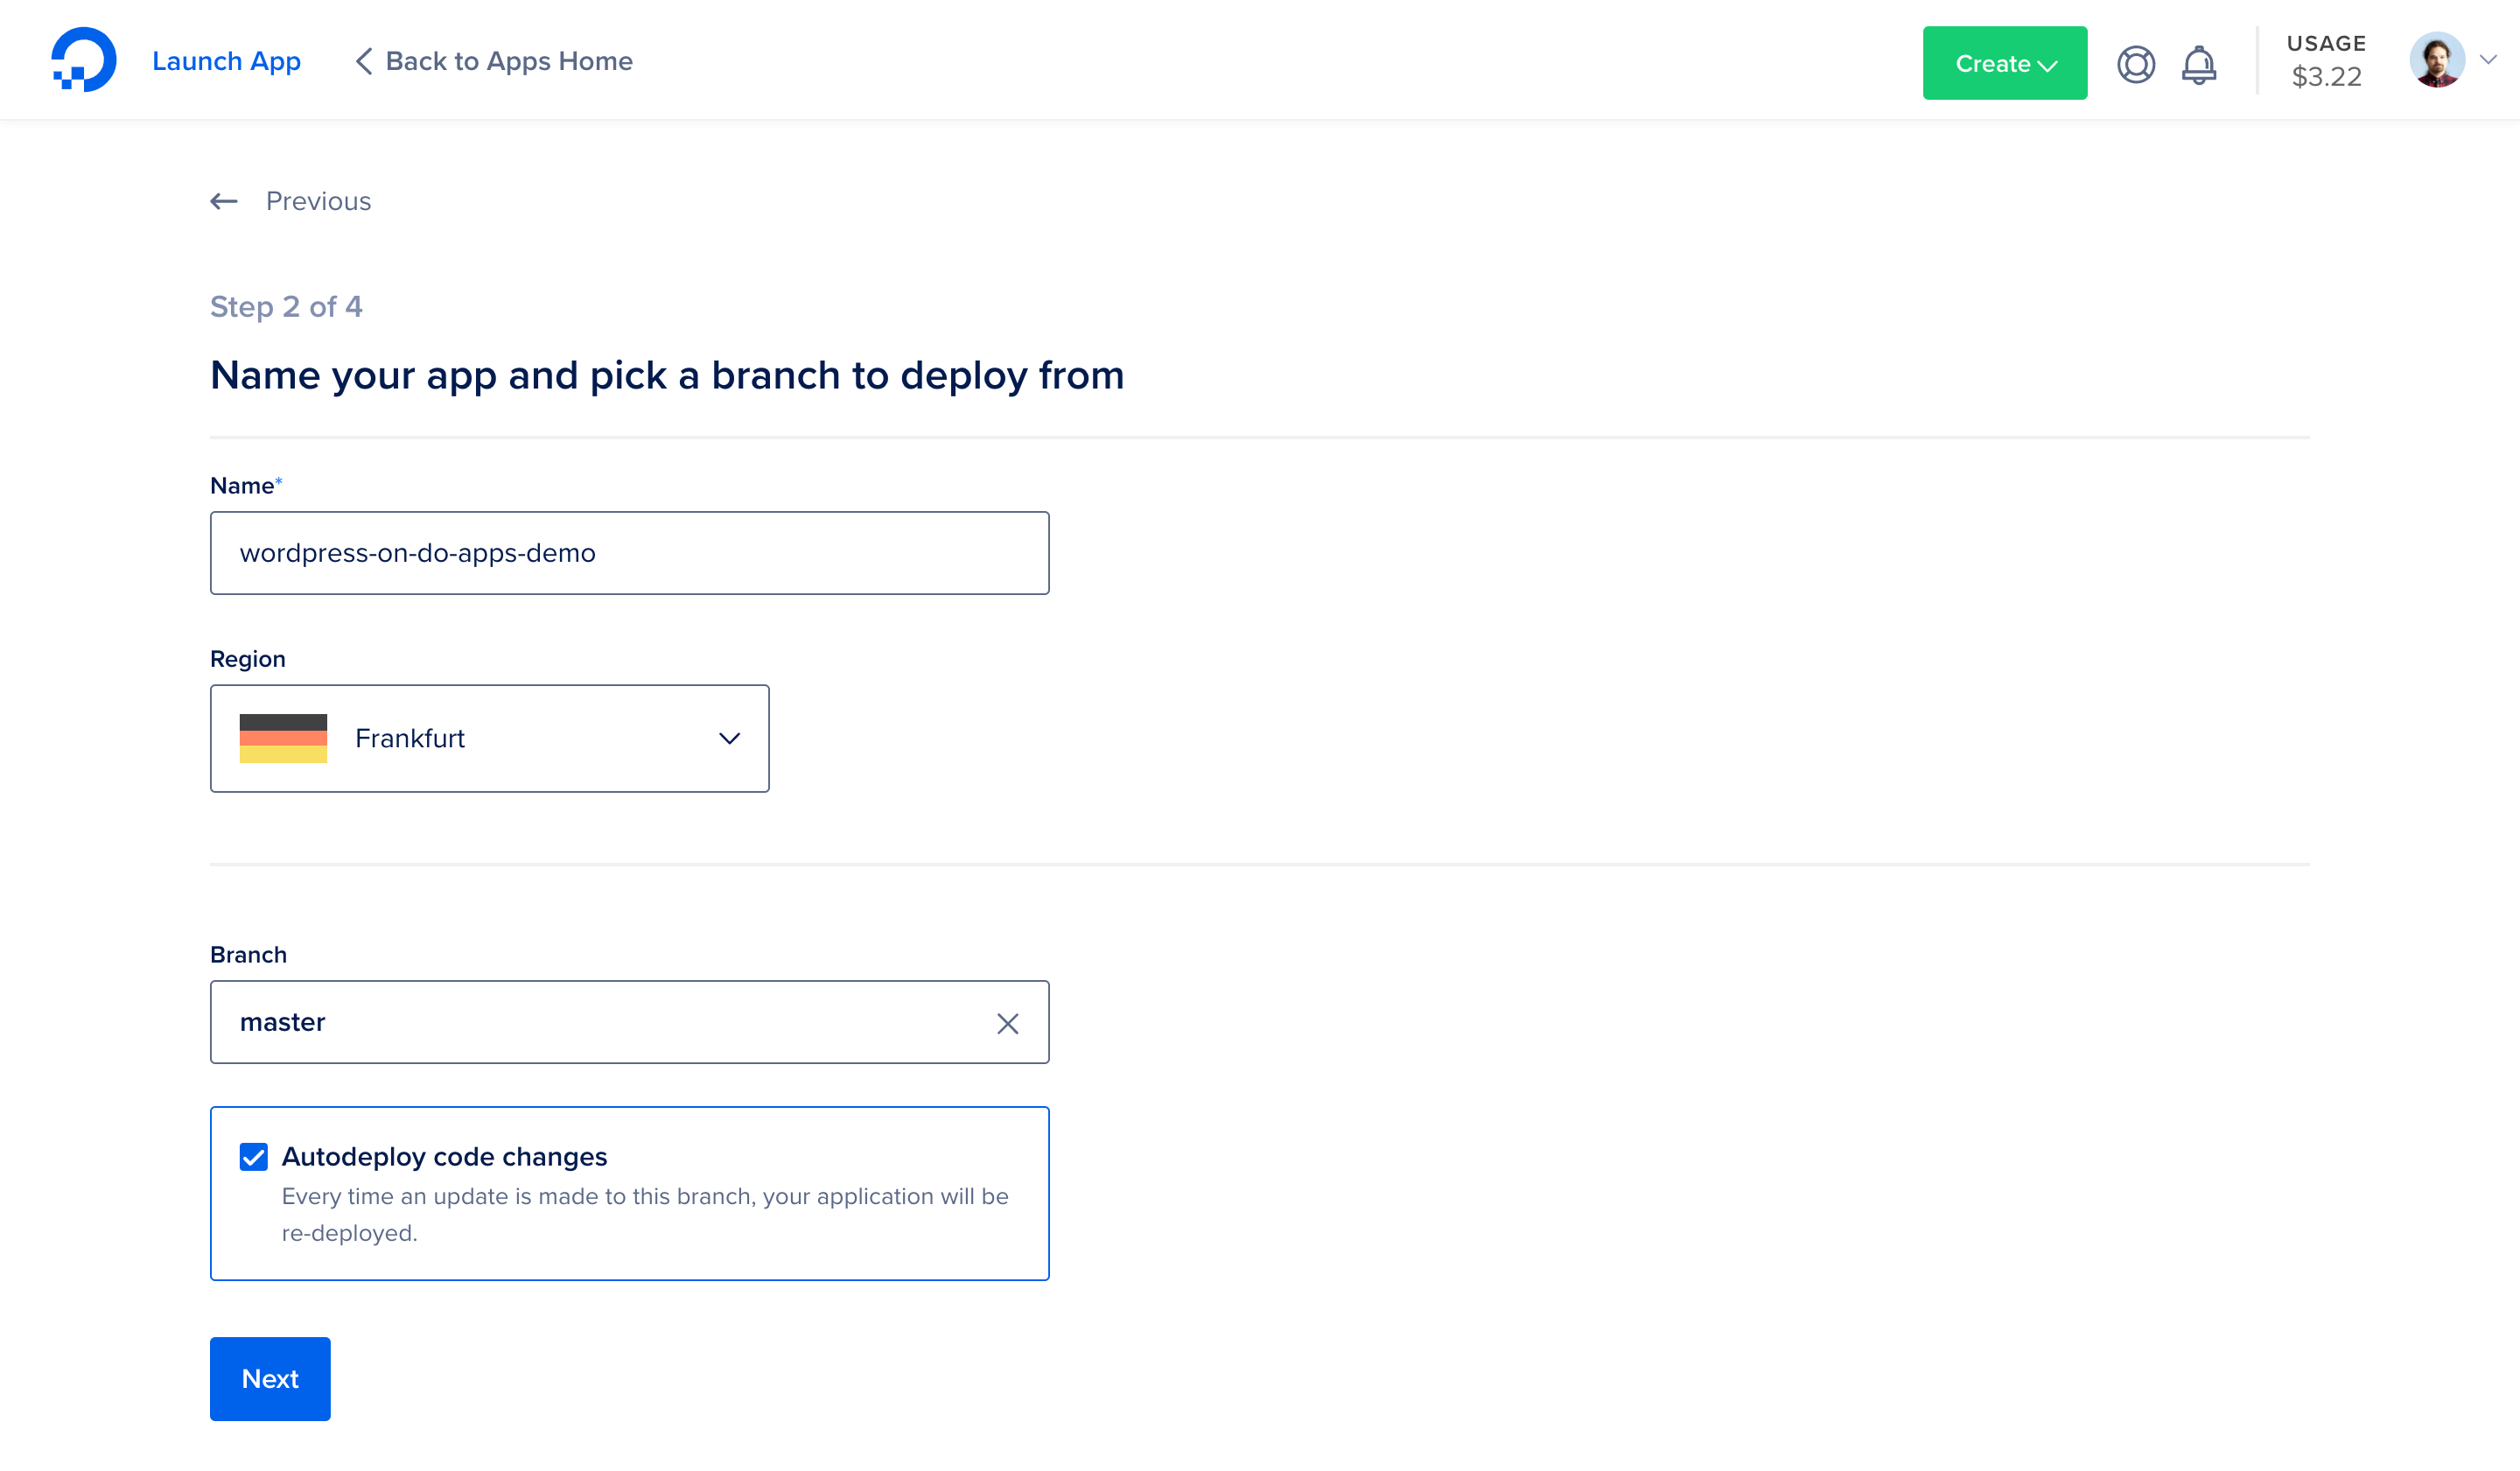
Enter a name for your app and select the region (this should be the same as the database you created) and press next.
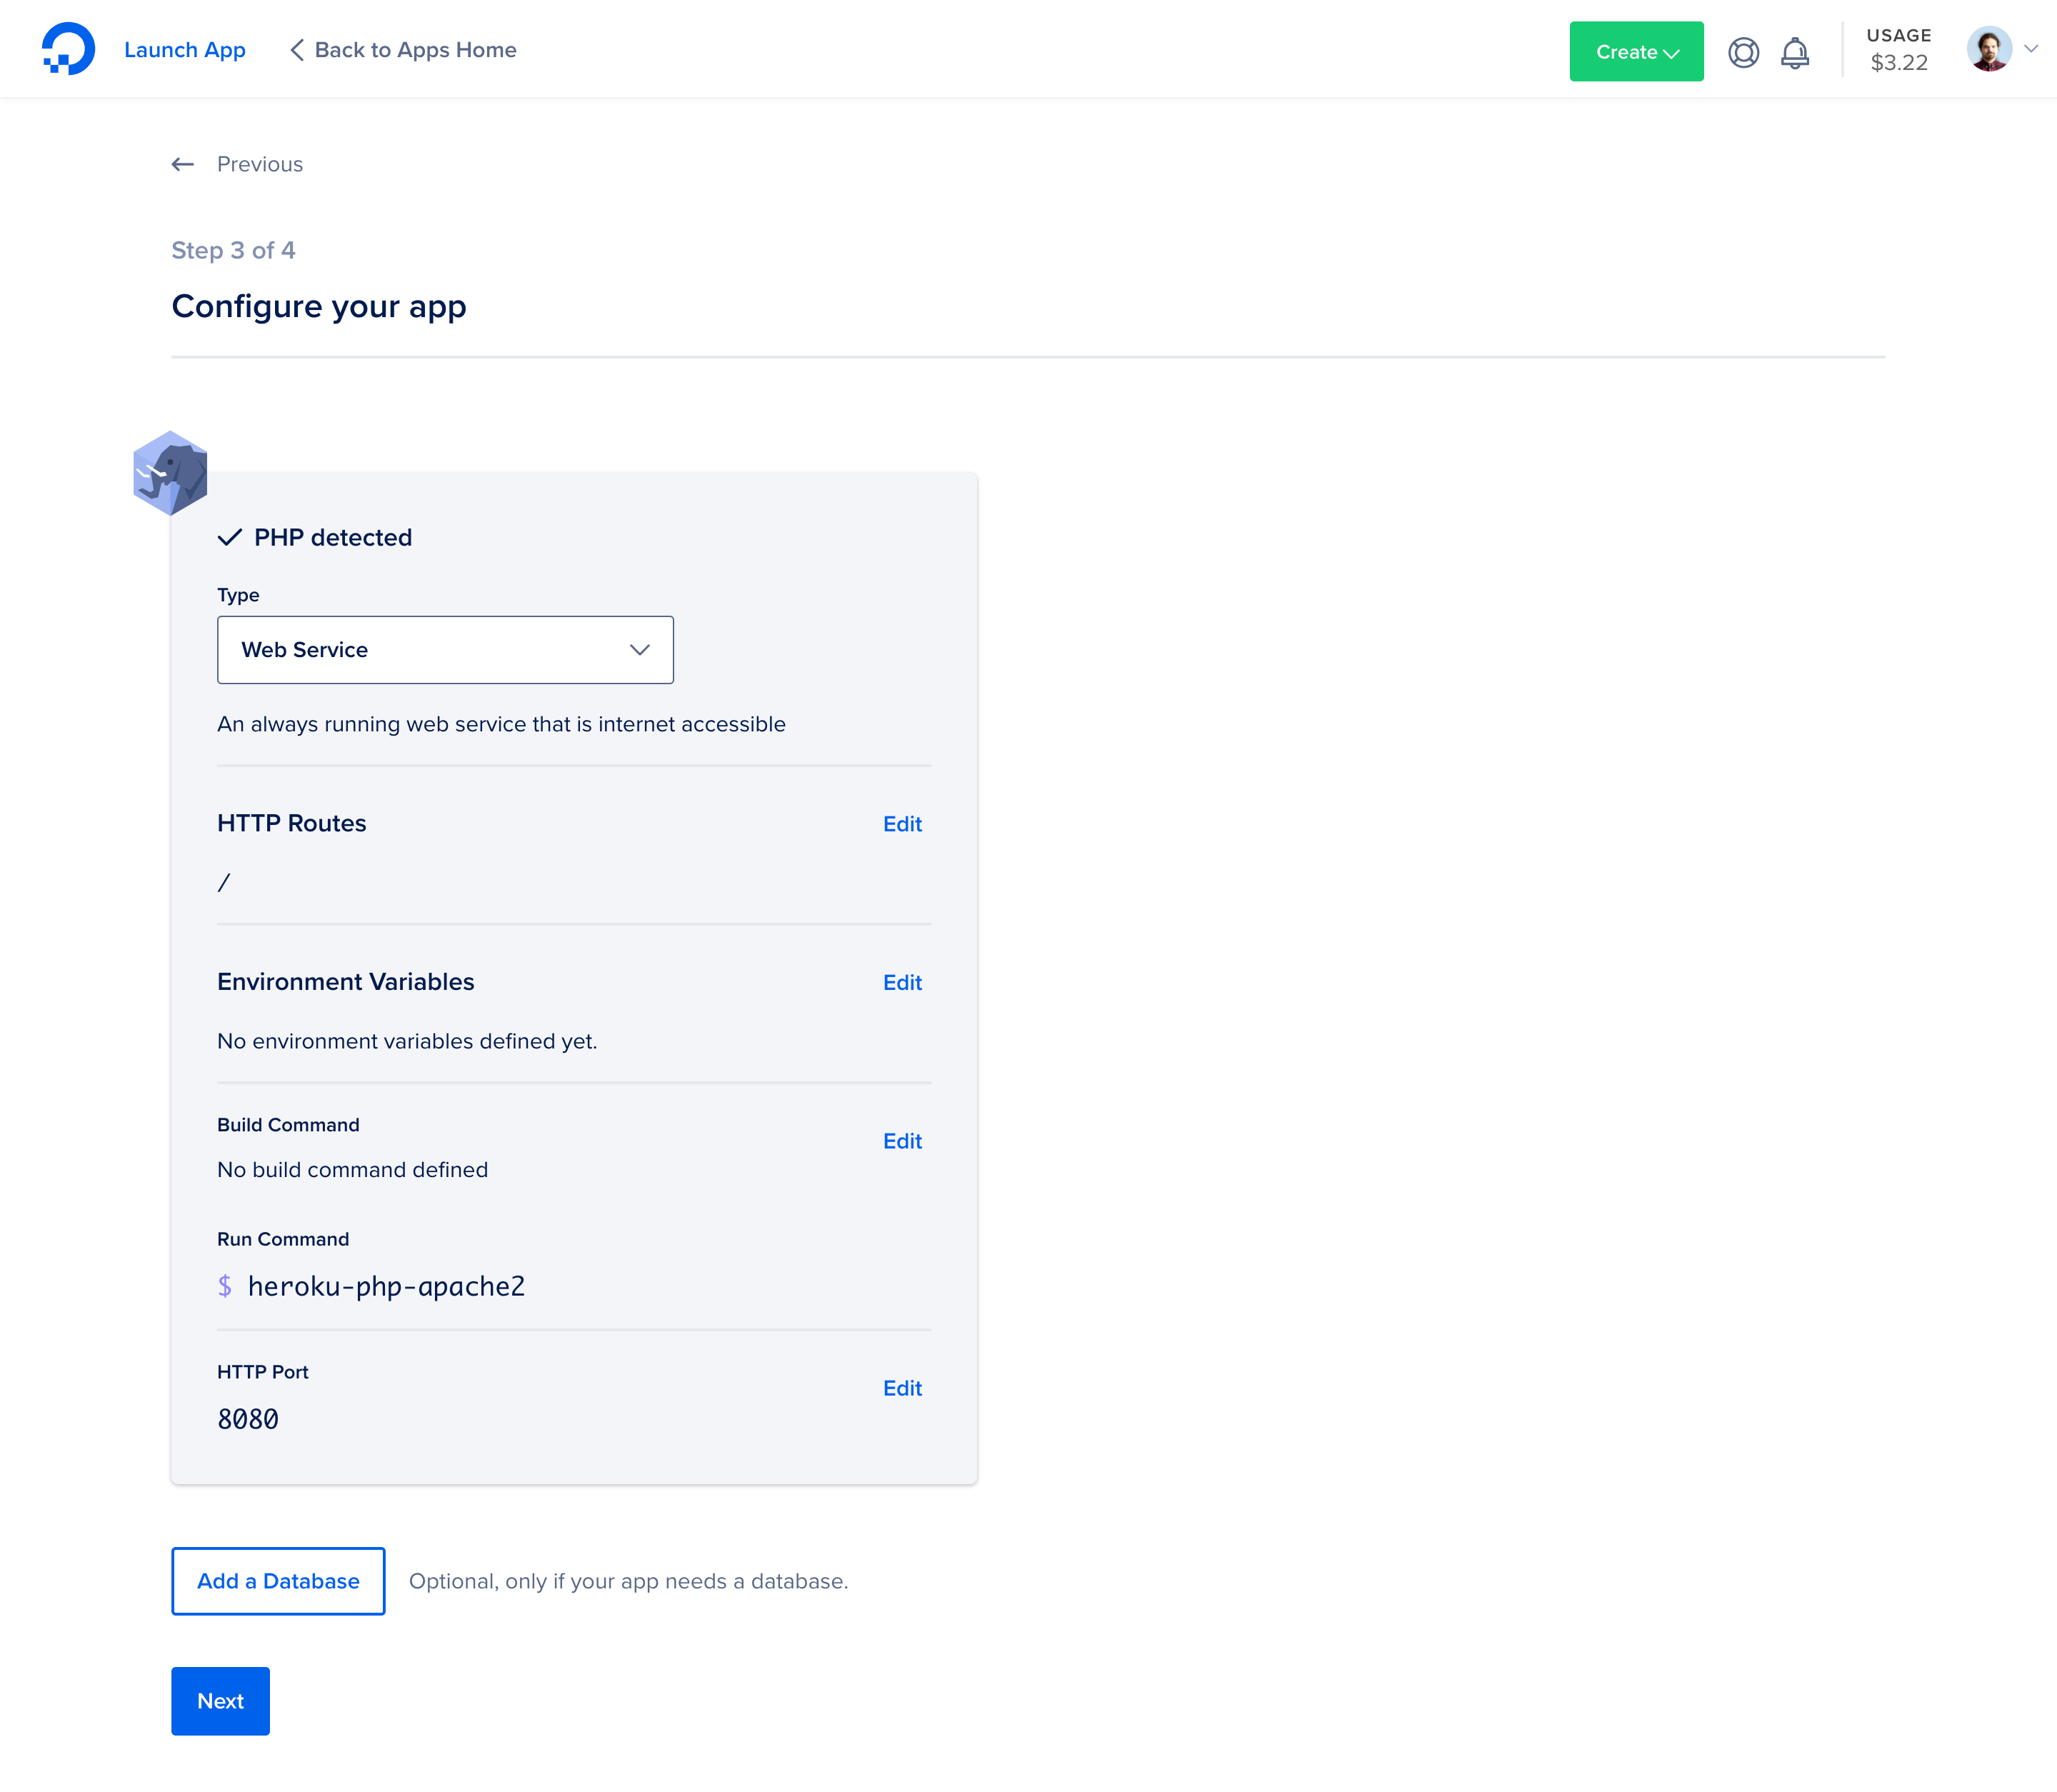
App platform will autodetect your app type as PHP, but we’ll need to configure a few things. For run command, enter
heroku-php-nginx -C nginx.conf web/
You can leave the HTTP port as-is since this is the internal port used by the built-in App Platform load balancer.

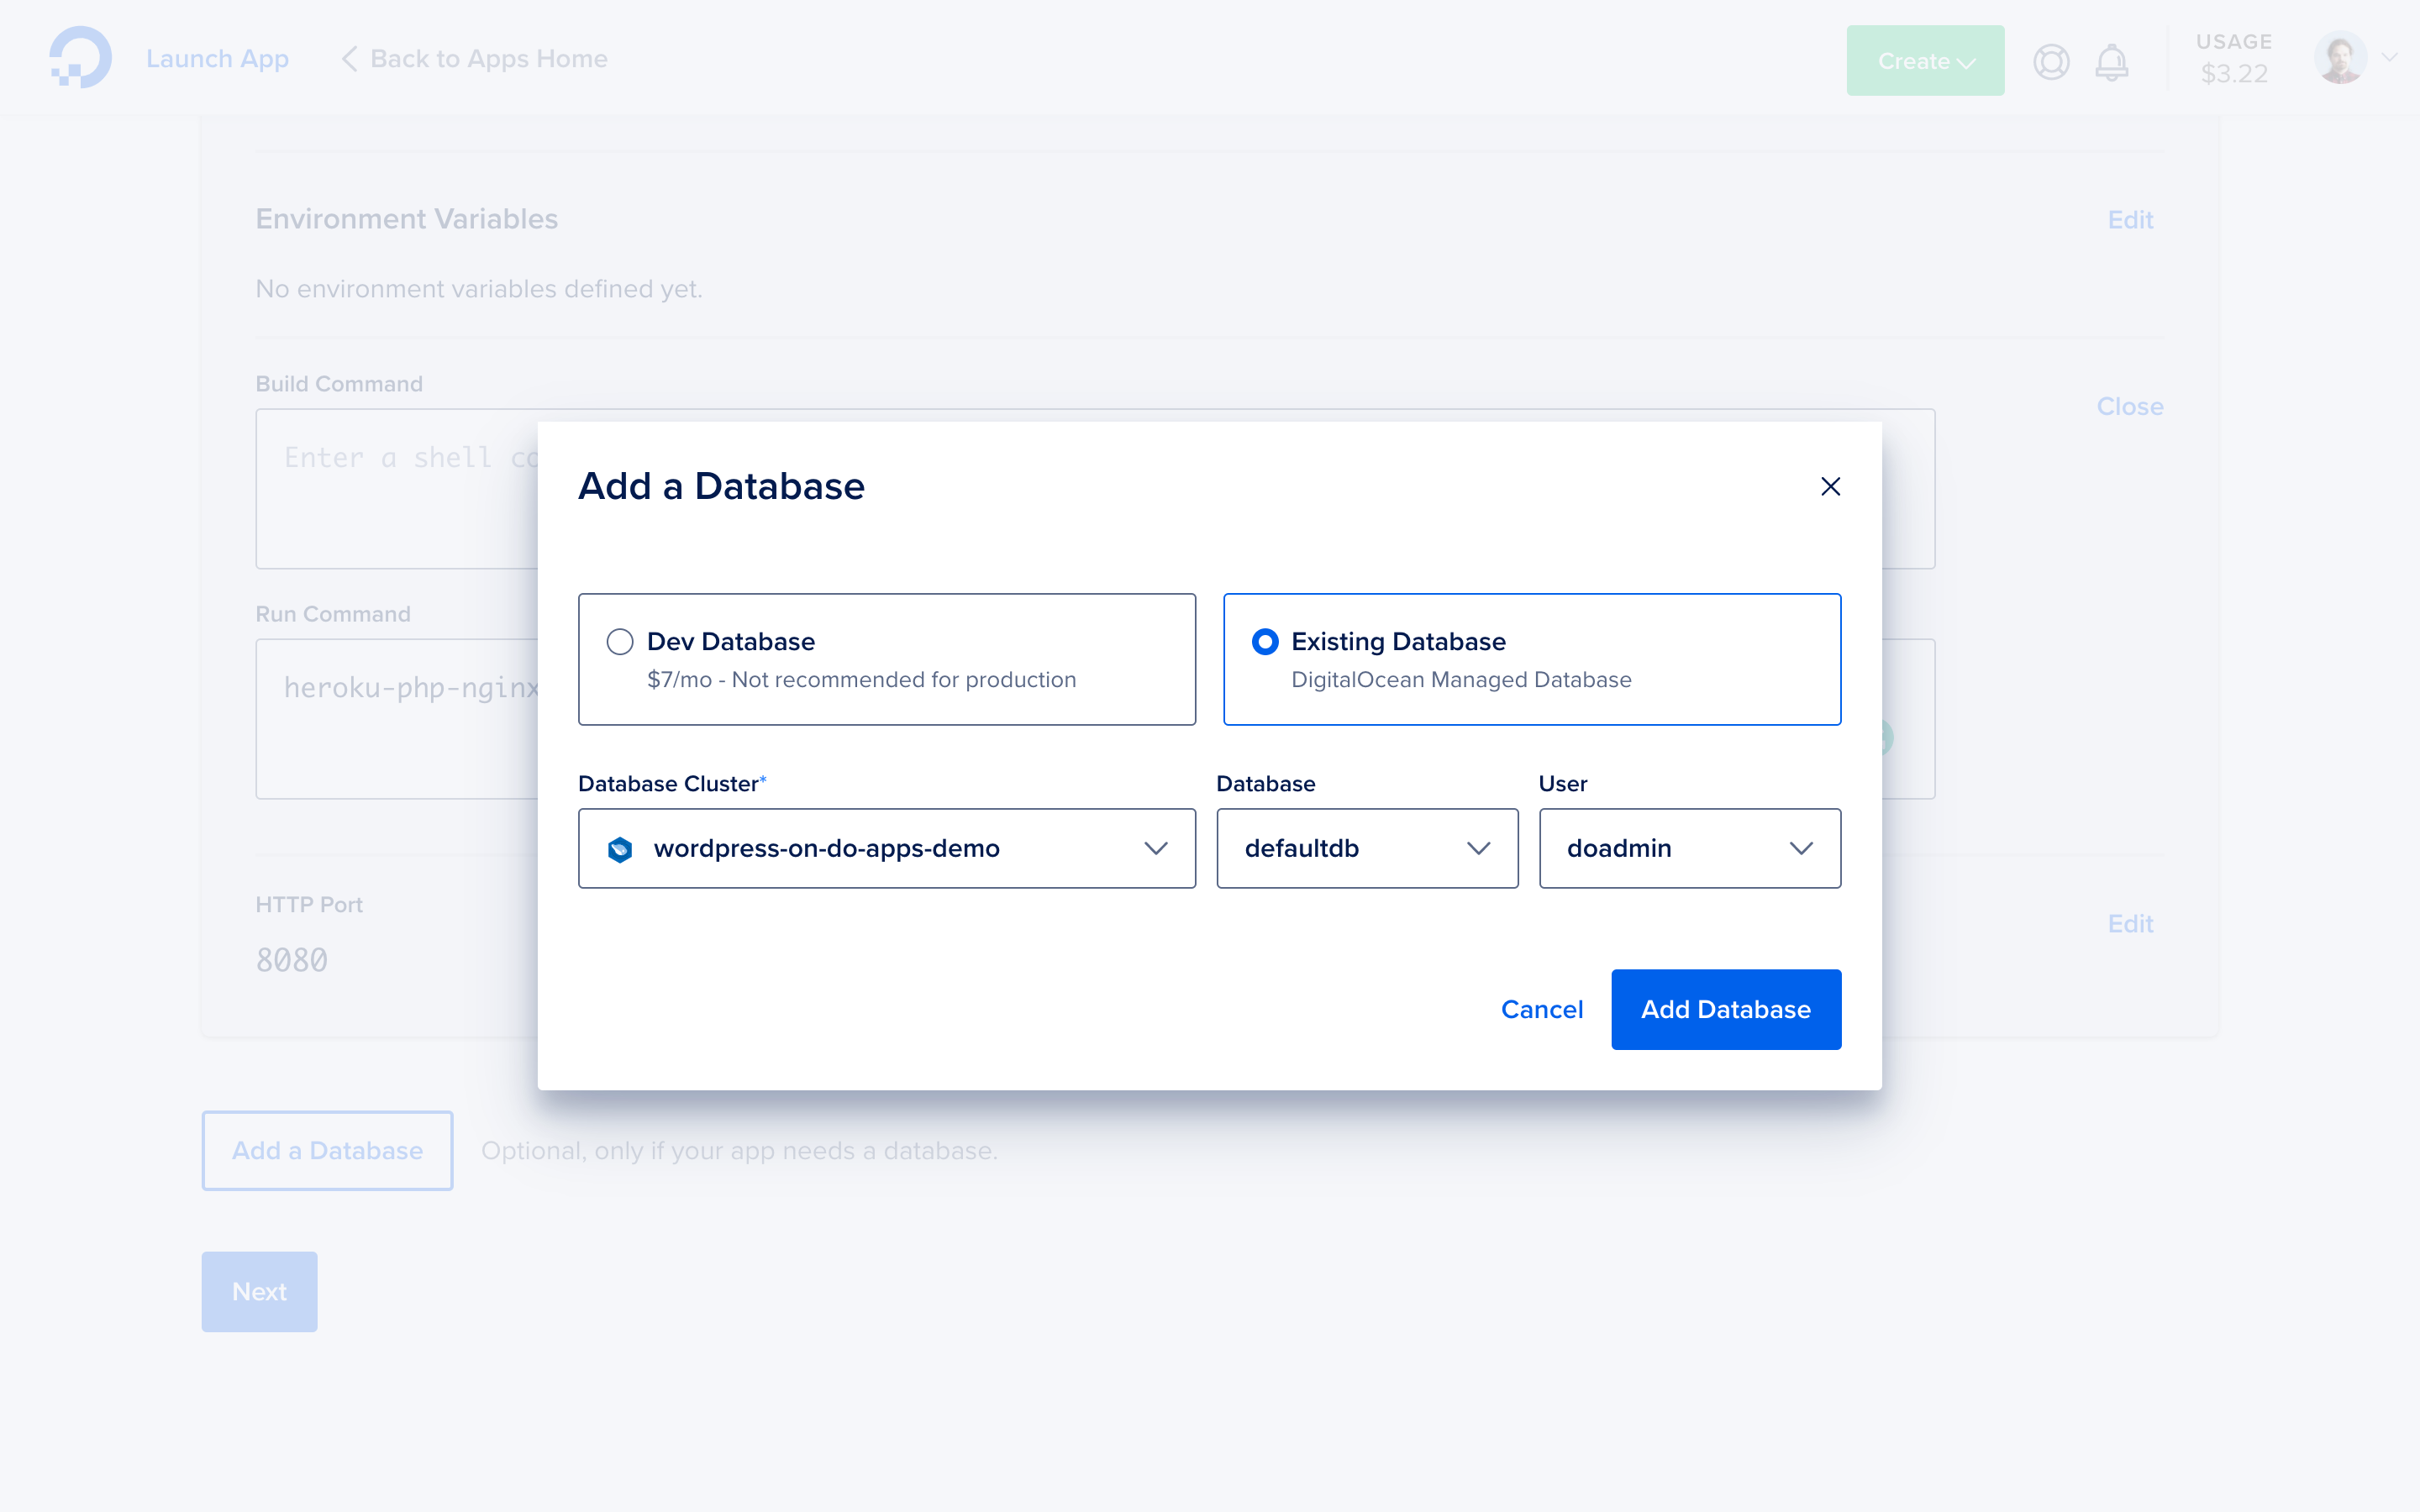
After this, click “Add a Database”, click “Existing Database” and select the database we created before. Select the default database and user.
Once the configuration is done, click Next

Select which pricing tier you want to use, I’m going to use Pro. Also, select the container size.
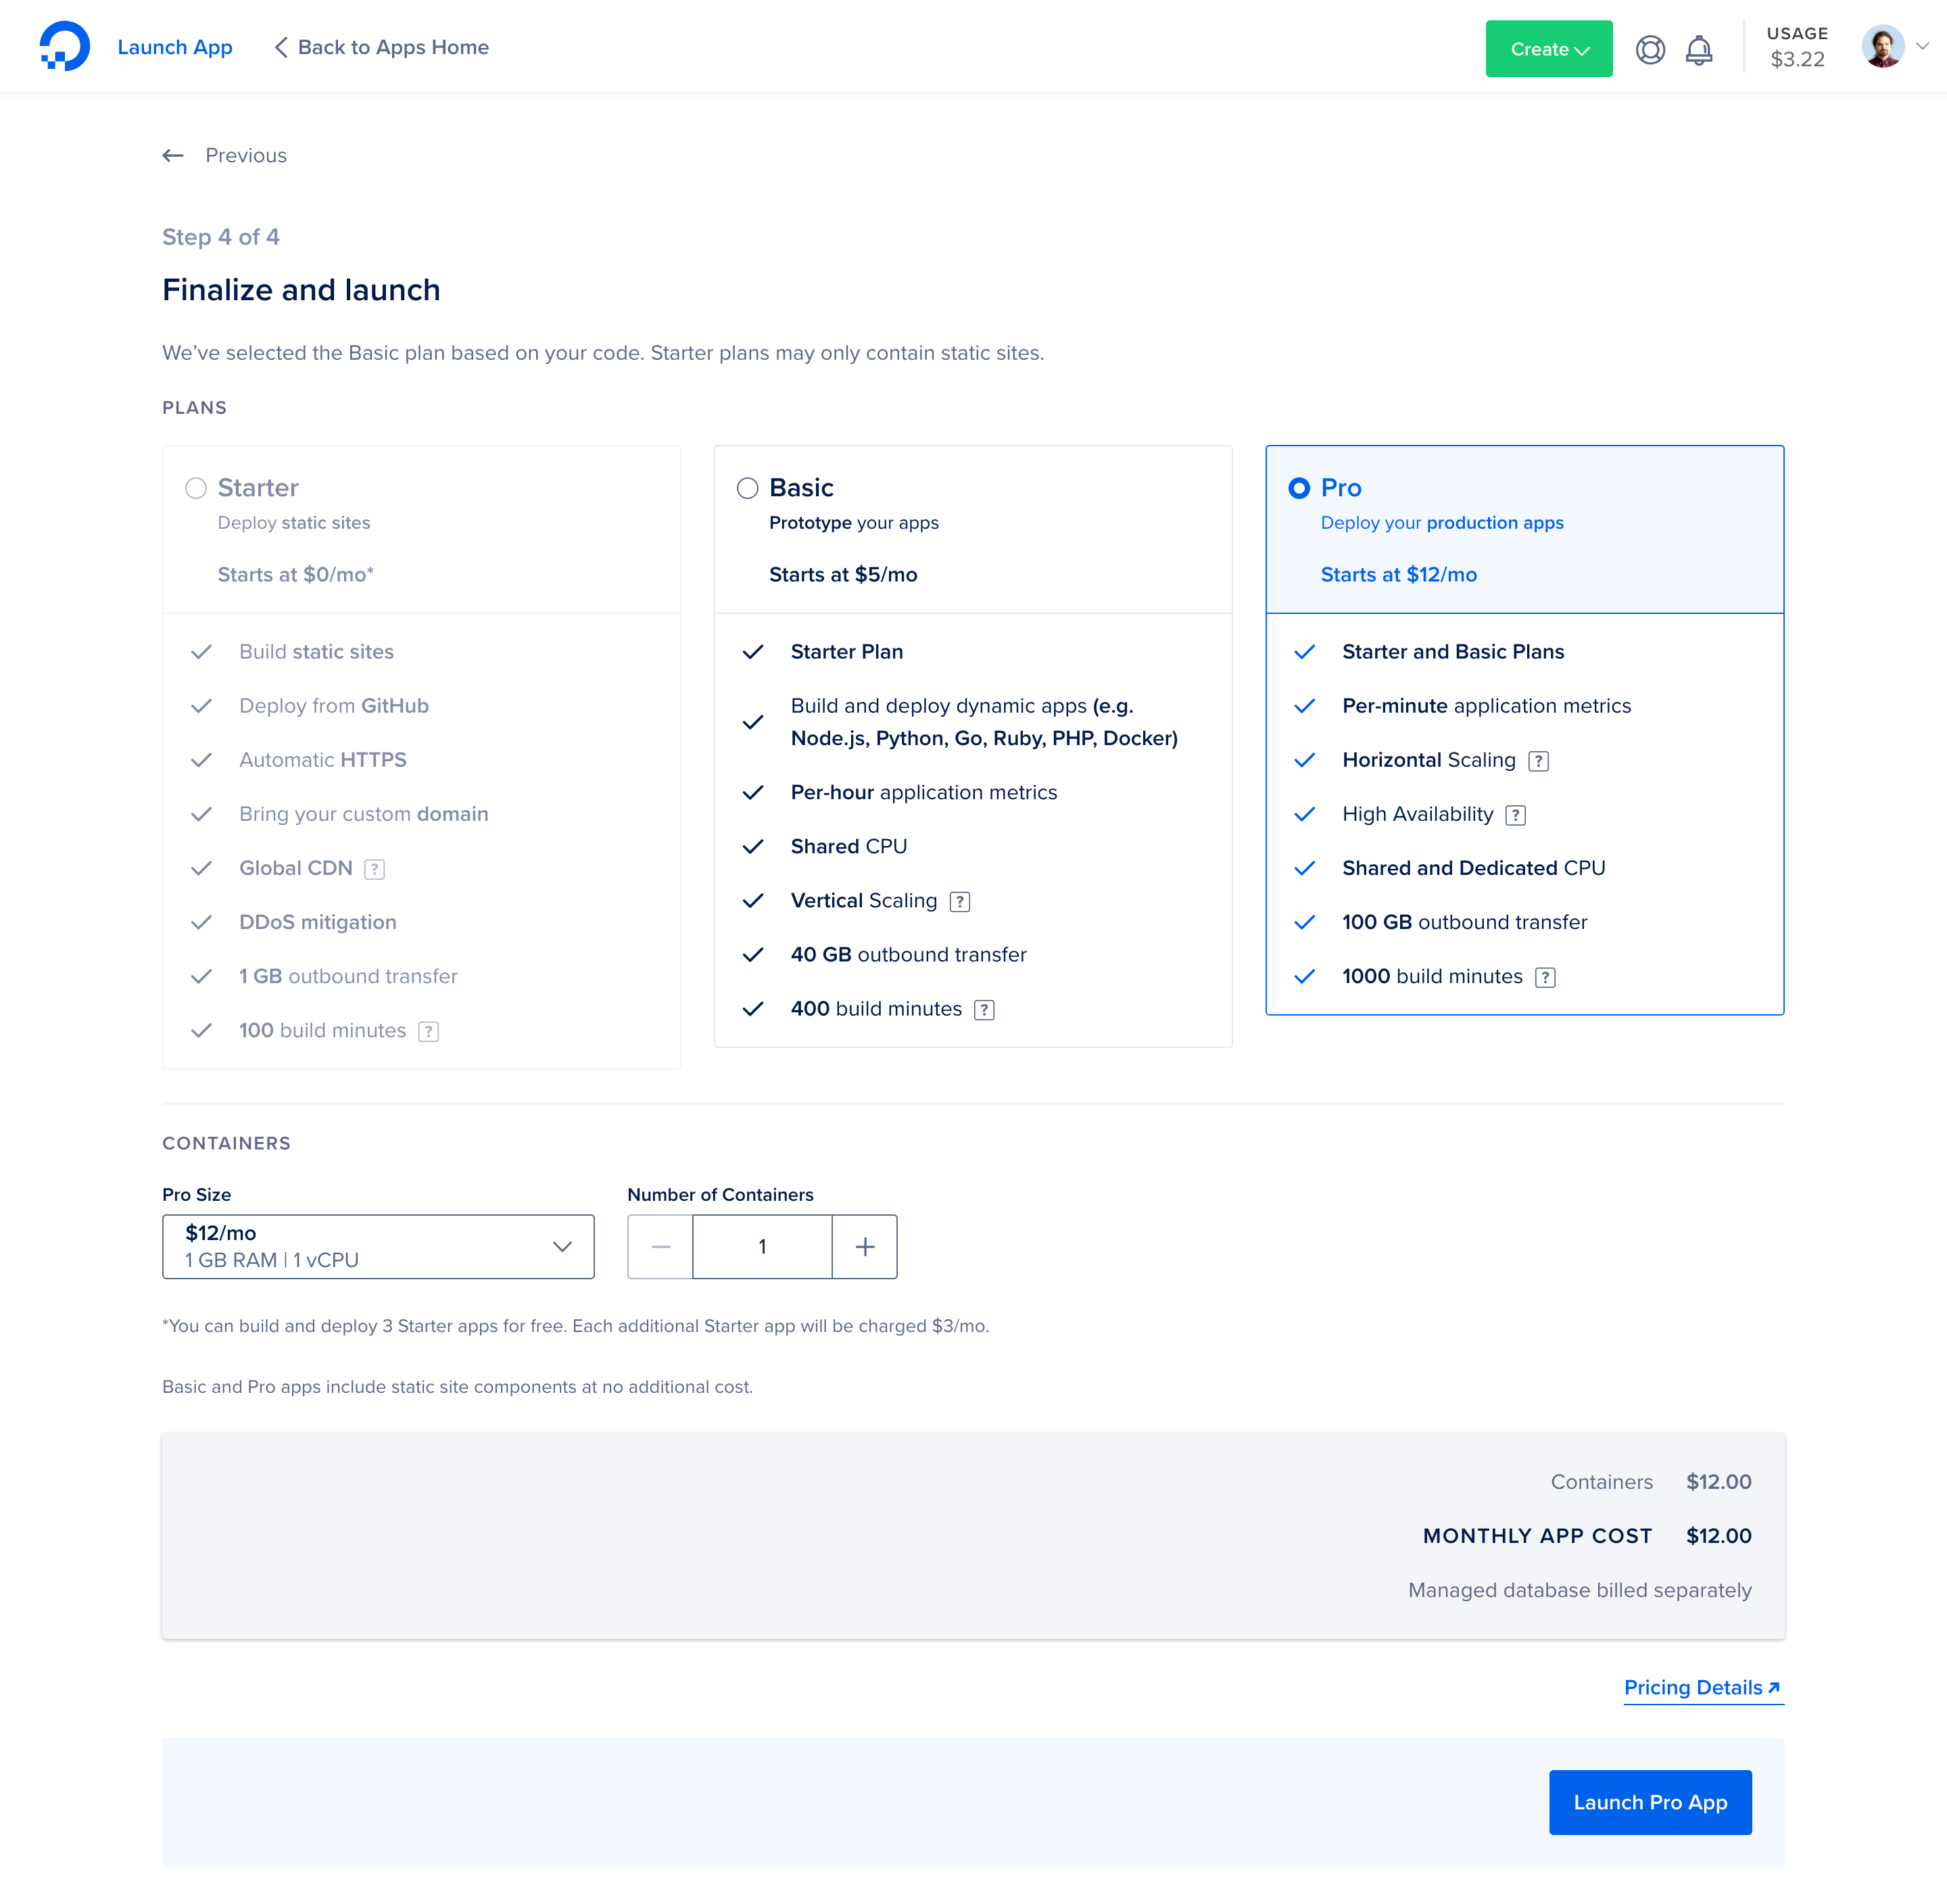
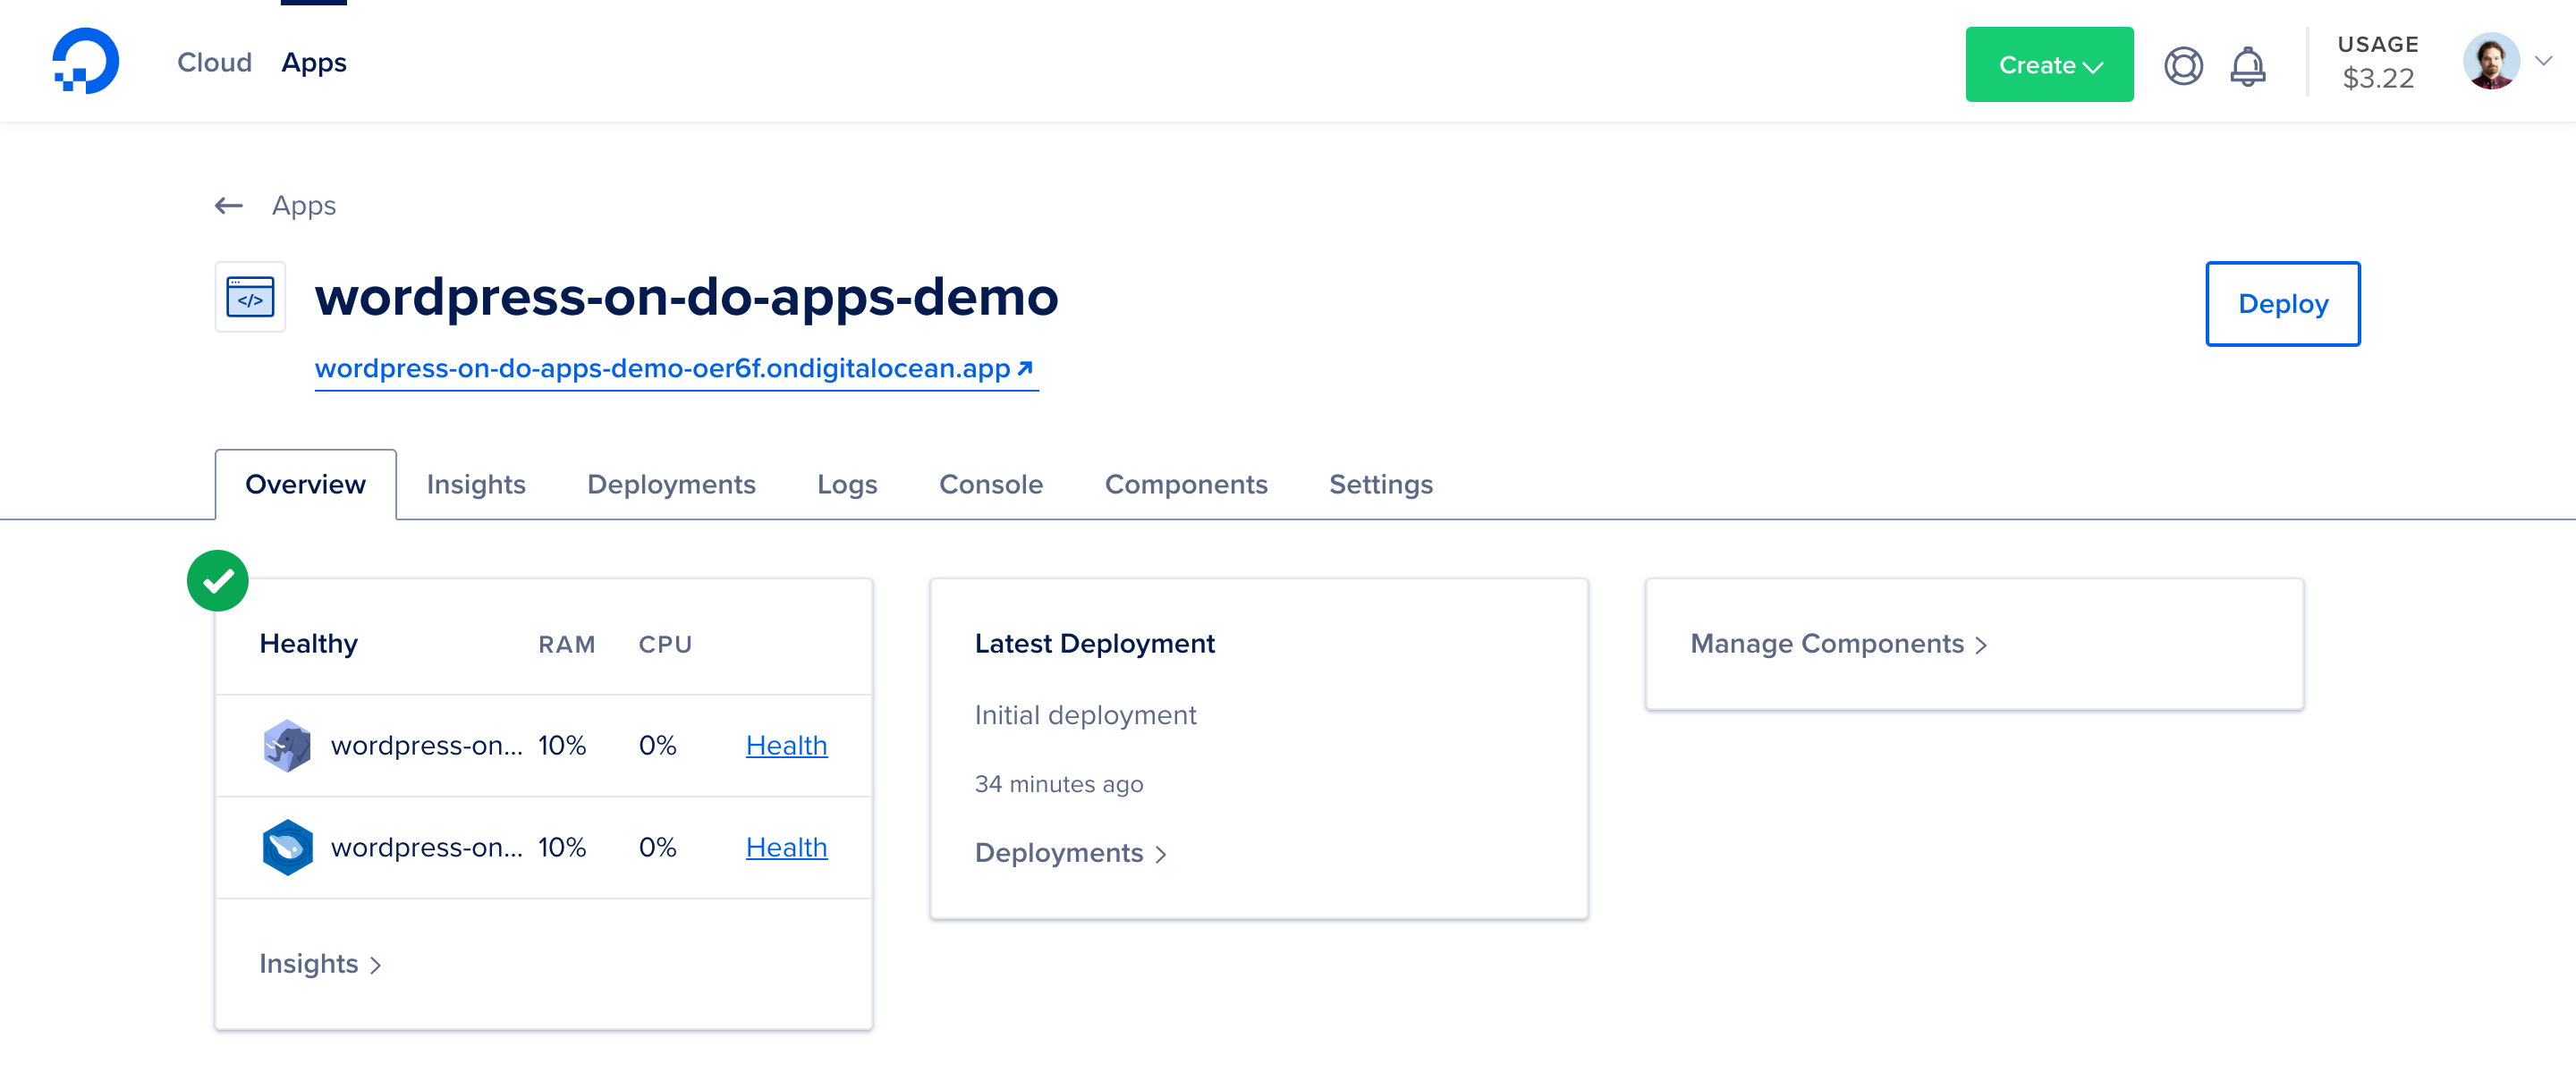
Next, launch the app. After a couple of minutes, we have our site up and running.
Configure environment variables
Next, we’ll have to add a few environment variables so WordPress will route the site correctly. We don’t need to add DATABASE_URL since it’s automatically set but we’ll need WP_HOME and WP_SITEURL. Set these to your DigitalOcean generated URL, in this case:
WP_HOME=https://wordpress-on-do-apps-demo-oer6f.ondigitalocean.app
WP_SITEURL=https://wordpress-on-do-apps-demo-oer6f.ondigitalocean.app/wp
Saving the environment variables will redeploy the site. After this is done, we need to complete the WordPress installation wizard.
Install WordPress
Navigate to the site URL and you’ll see the WordPress installation page.

Enter the required details and click “Install WordPress”. After the setup is complete, you can log into the WordPress administration dashboard with the username and password entered in the previous step.
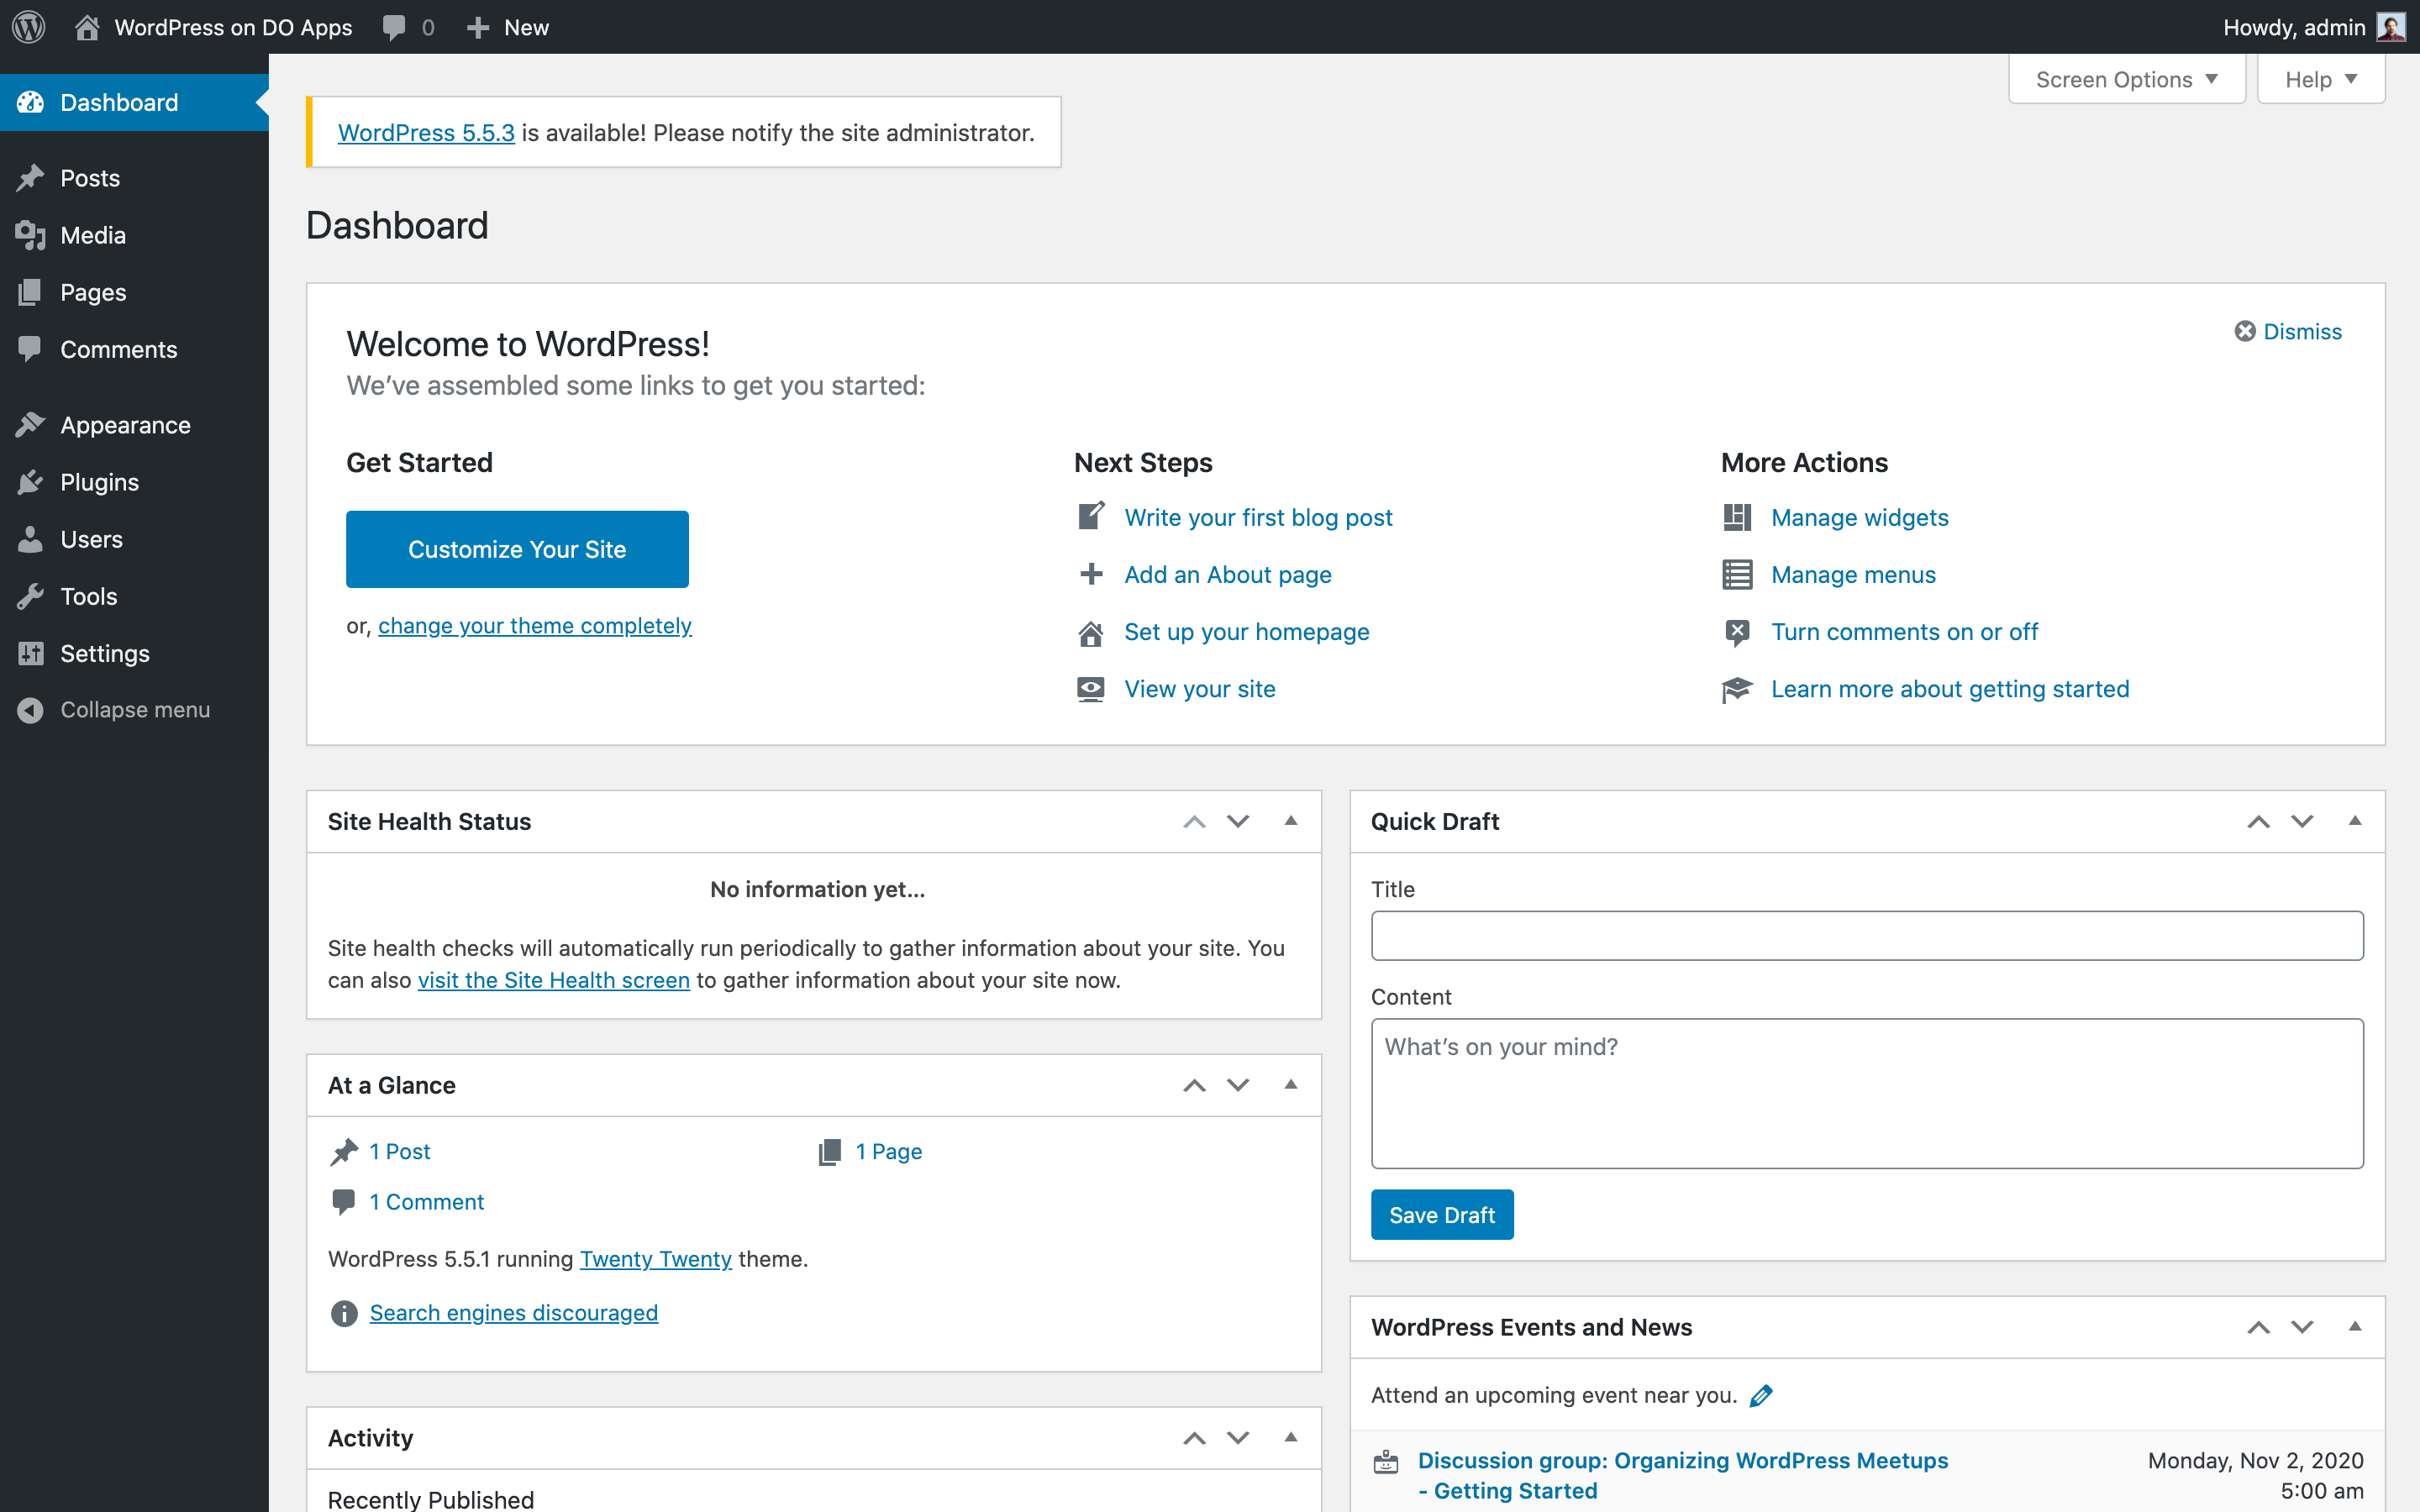
Congratulations, you now have WordPress running in DigitalOcean App Platform! There are still two problems we need to solve, both have to do with WordPress media.
Installing ImageMagick
First, we are missing a PHP extension to process images for WordPress thumbnail functionality. You can use either GD or ImageMagick, I recommend ImageMagick since it’s more feature complete.
DO App Platform uses Composer to manage PHP extensions. You can install ImageMagick with the following command in the project:
composer require ext-imagick:* --ignore-platform-reqs
This will add the ImageMagick requirement in composer.json and DO App Platform will automatically enable ImageMagick for us.
You’ll probably want to install the optional-but-recommended mbstring and exif PHP extensions with the following command:
composer require ext-mbstring:* ext-exif:* --ignore-platform-reqs
Fixing media upload
Another problem is that the filesystem is ephemeral, every time we deploy the app, all files we upload are lost. To fix this, we can use a plugin to upload our files to cloud storage like DigitalOcean Spaces.
We are using WP Offload Media Lite, you can install it using the following command in the project:
composer require wpackagist-plugin/amazon-s3-and-cloudfront
Then push to updated composer.json and composer.lock to git.
Create a new DigitalOcean space.
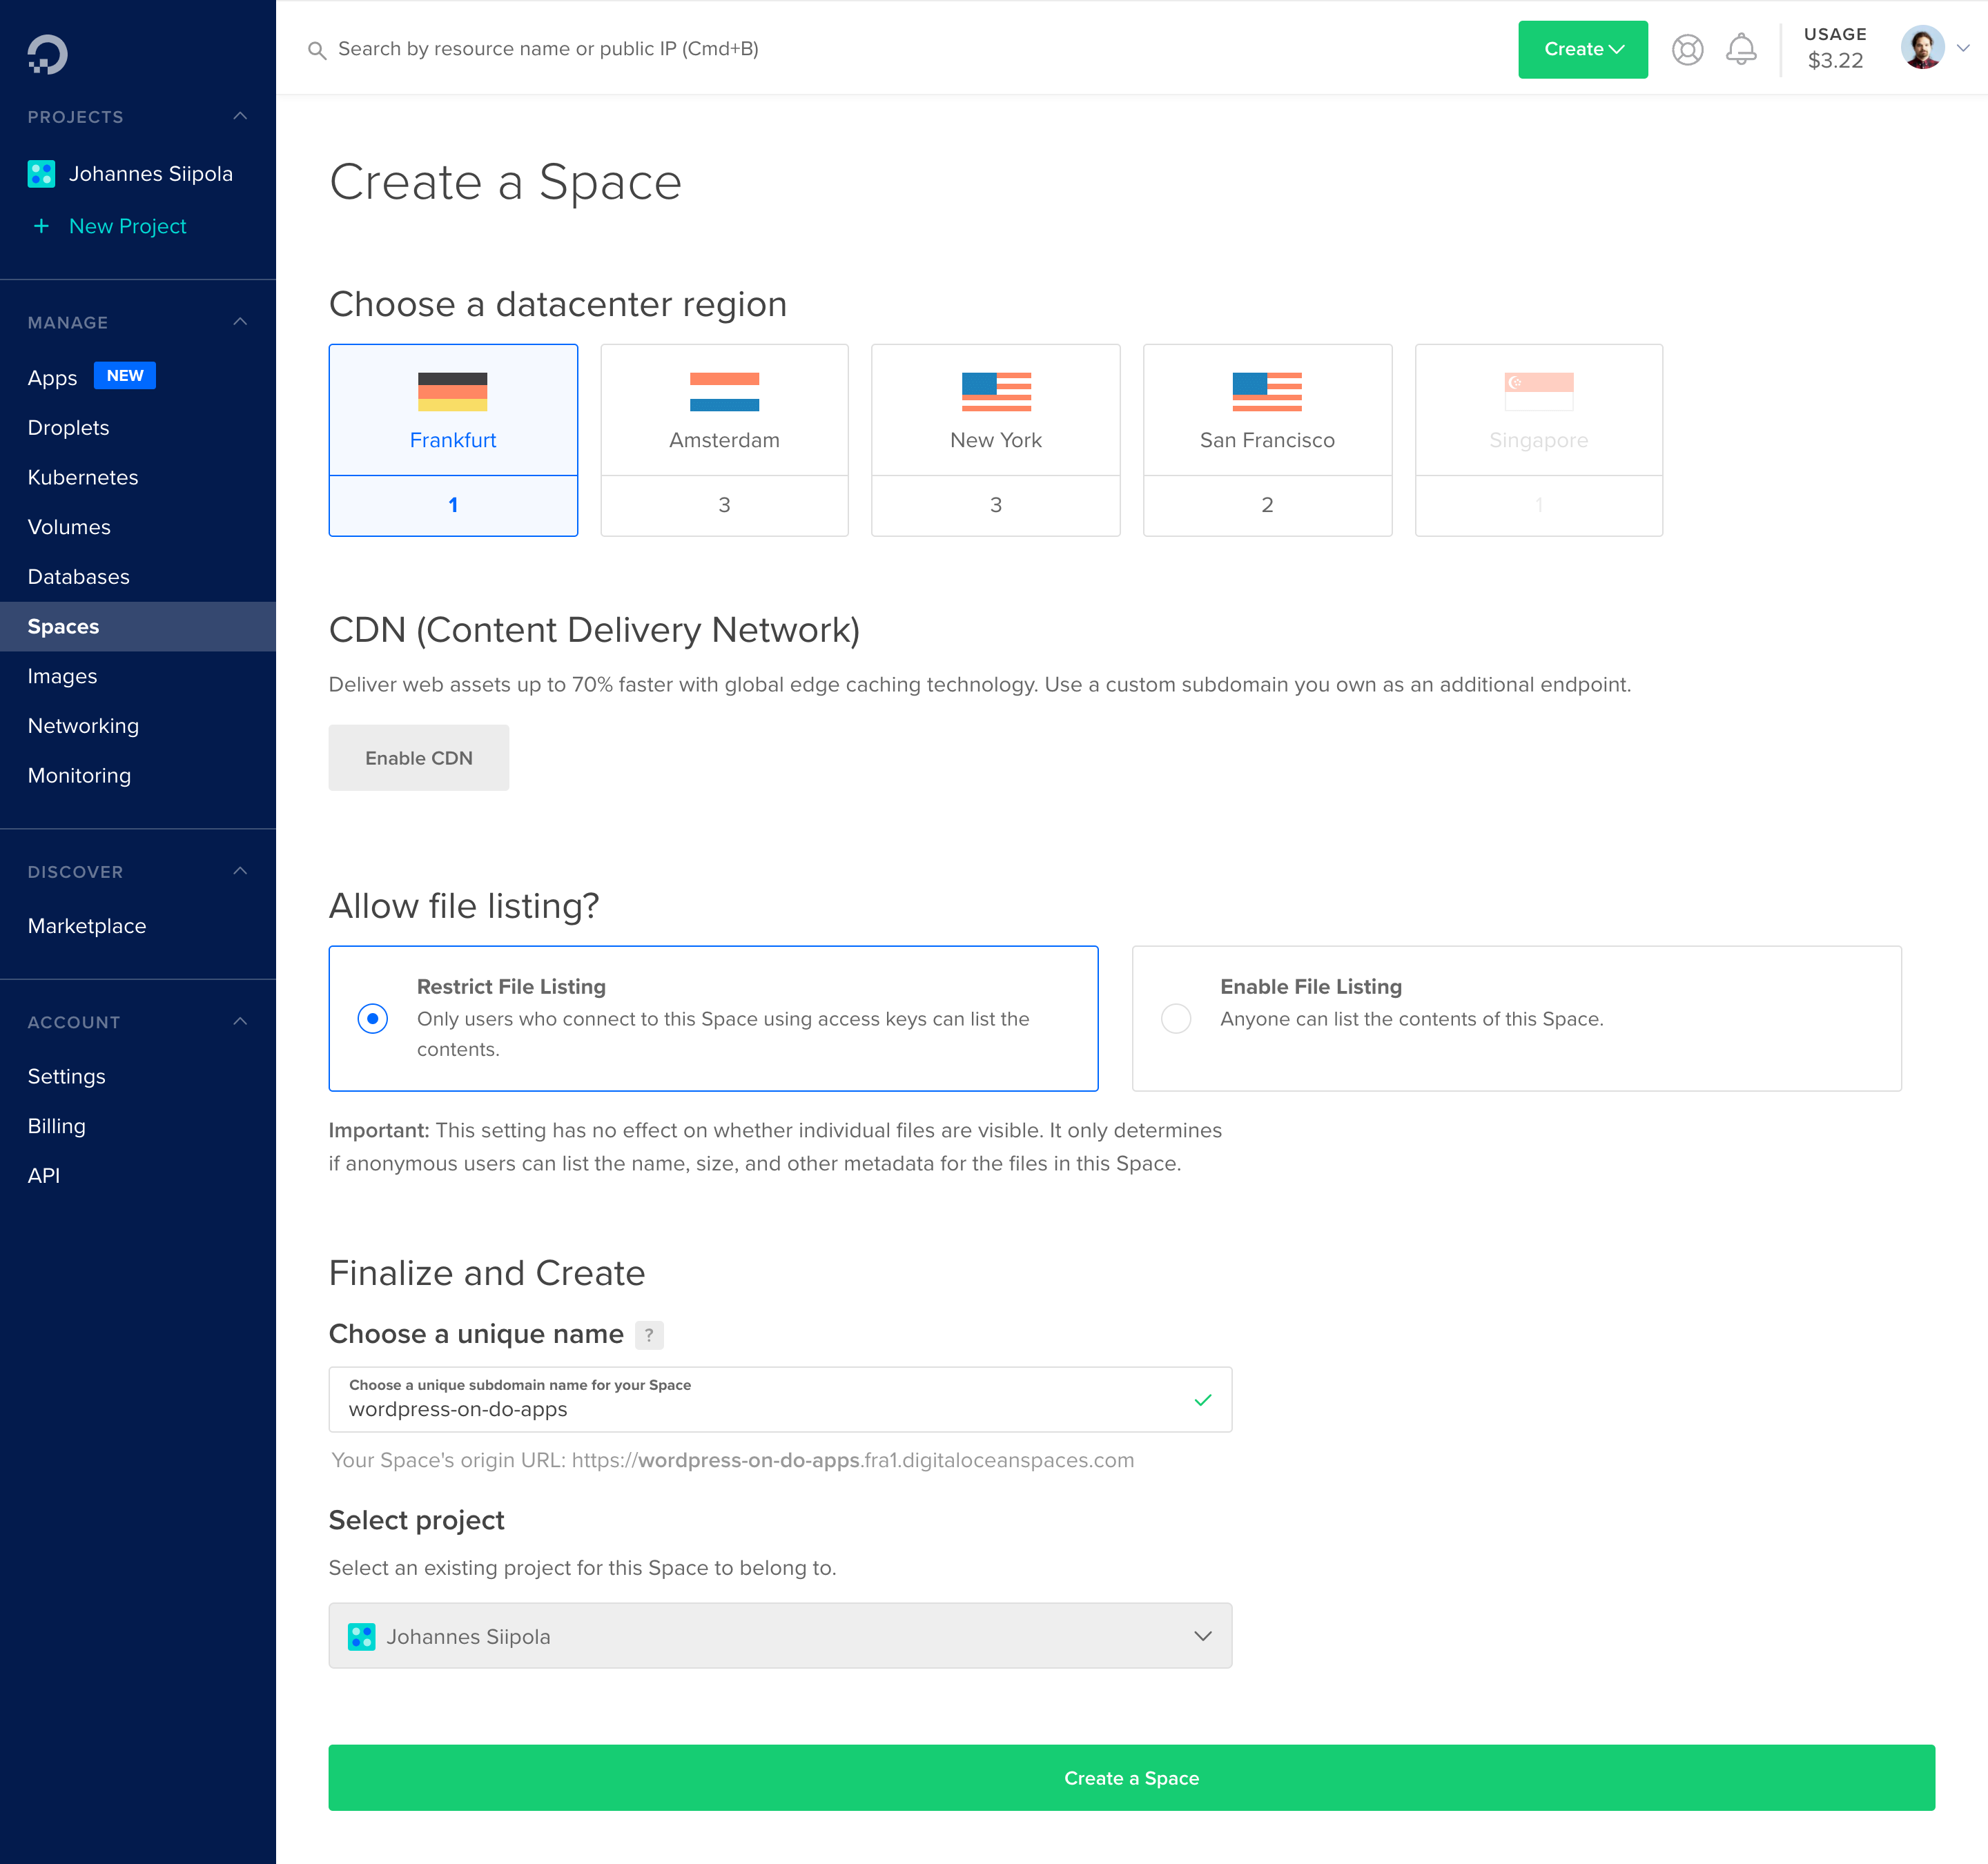
Go to Spaces -> Manage Keys and generate new access keys.

On the WordPress side, activate the WP Offload Media plugin and enter the access keys on the plugin options page.

Select the data center and enter the Space name.
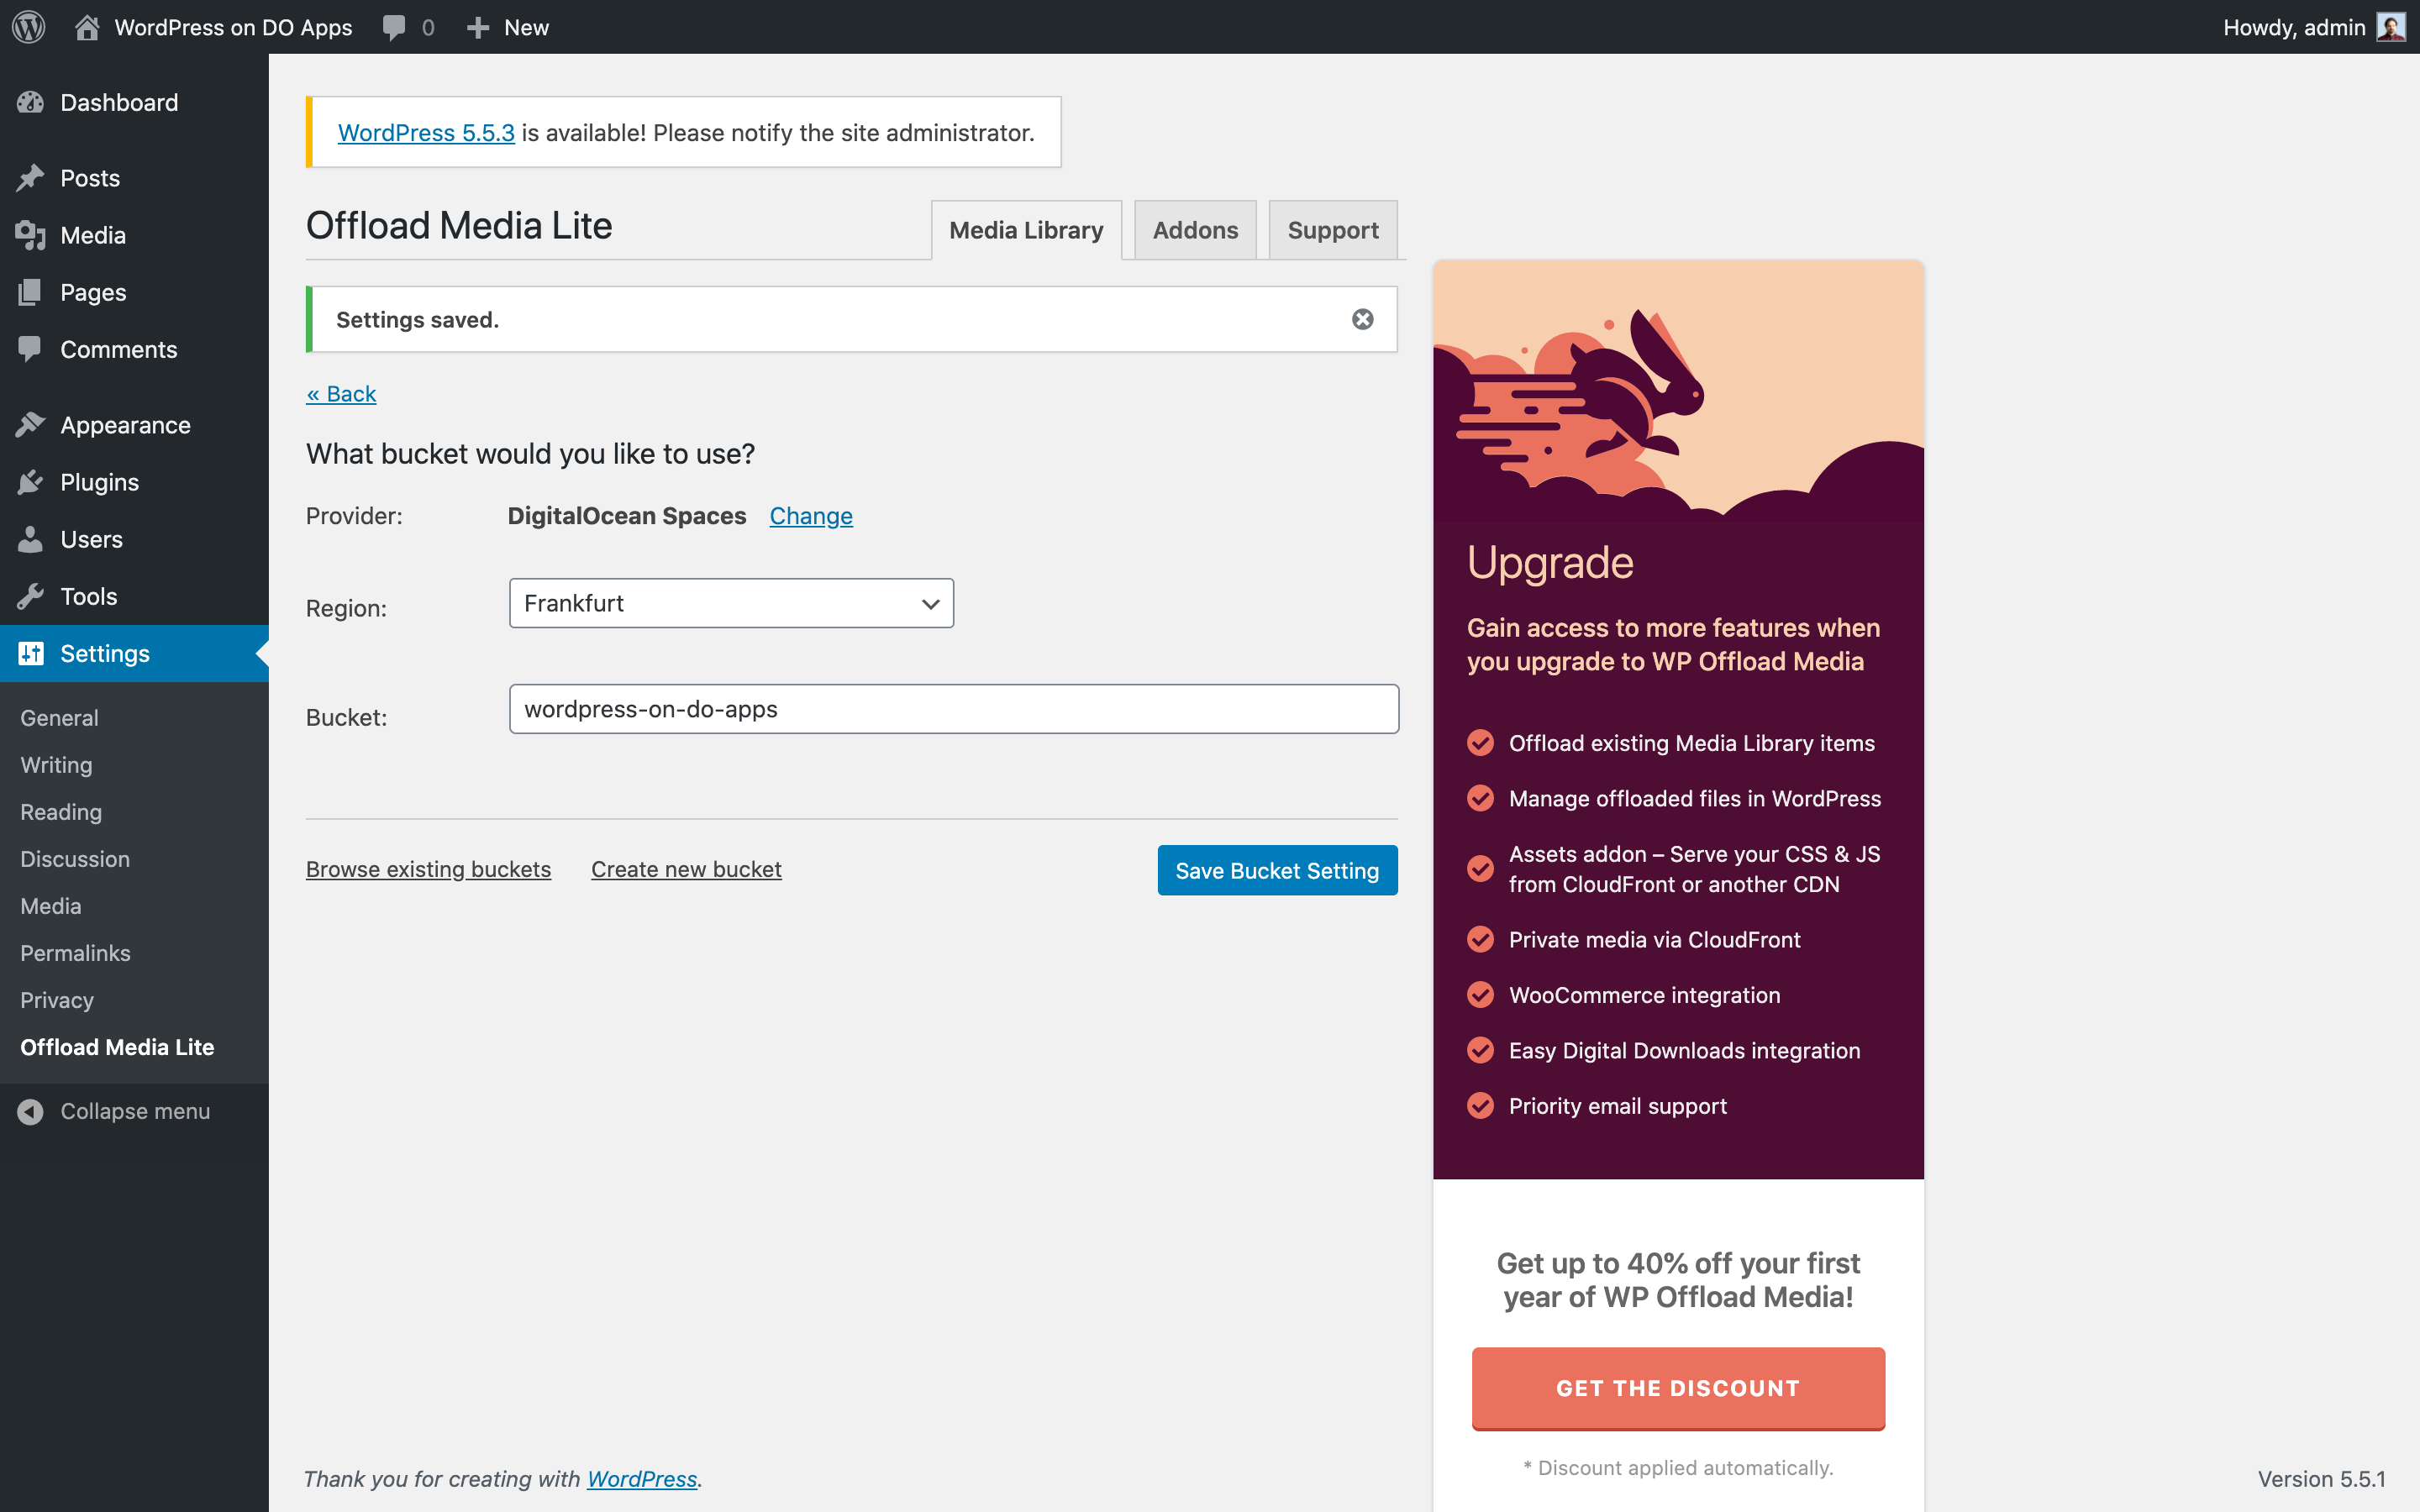
Congratulations, now your files will be uploaded to Spaces and will persist between deployments. Just make sure to configure the CDN for the Spaces afterwards.

In closing
Our new site is looking pretty good but there as still a couple of things that could be improved, first, we could replace the WordPress Cron with a real Cron job. Since the DO App Platform doesn’t support Cron, we could use a Docker container with cURL installed to call /wp-cron.php every minute.
In case we want to use a custom theme we probably also need to run some commands to build the theme, like composer install, npm install, or webpack -p. I’d assume these will go in the build commands box in the DO apps configuration.
So far, I’m pretty impressed with the DigitalOcean App Platform. It’s reasonably priced and scaling the servers horizontally and vertically is simple. The only thing I would improve is the documentation which is a bit sparse at the moment.
I’m looking forward to using the App Platform in a real-life production project and I’ll keep you updated on how to best use the App Platform to accomplish this!
You can view the code I used for this example on GitHub.
Bonus: Increasing file upload size
By default, the maximum file upload size on the App Platform is a measly 2 megabytes. We can increase this to 100 megabytes quite easily by modifying Nginx and PHP configuration.
For Nginx, we can simply add the line:
client_max_body_size 100M;
In nginx.conf in the root of our repo.
For PHP, we need to create a custom php.ini. Ironically, the Heroku documentation is better than the DigitalOcean documentation in this regard. In short, we need to create a file called .user.ini in the document root of our repository. So, create a new file called .user.ini in the web directory and put the following content in it:
post_max_size = 100M
upload_max_filesize = 100M
And you’re done. After the app has re-deployed itself, you will be able to upload a file up to 100 megabytes.
Follow-up
If you are interested, do read my follow-up blog post on WordPress and DigitalOcean App platform where I go over some things like improving performance, sending email, and setting up Cron scheduler.
Last updated on 2021-02-11.
2021-02-11
Added the recommended mbstring and exif PHP extensions.
2021-02-10
Added link to follow-up post